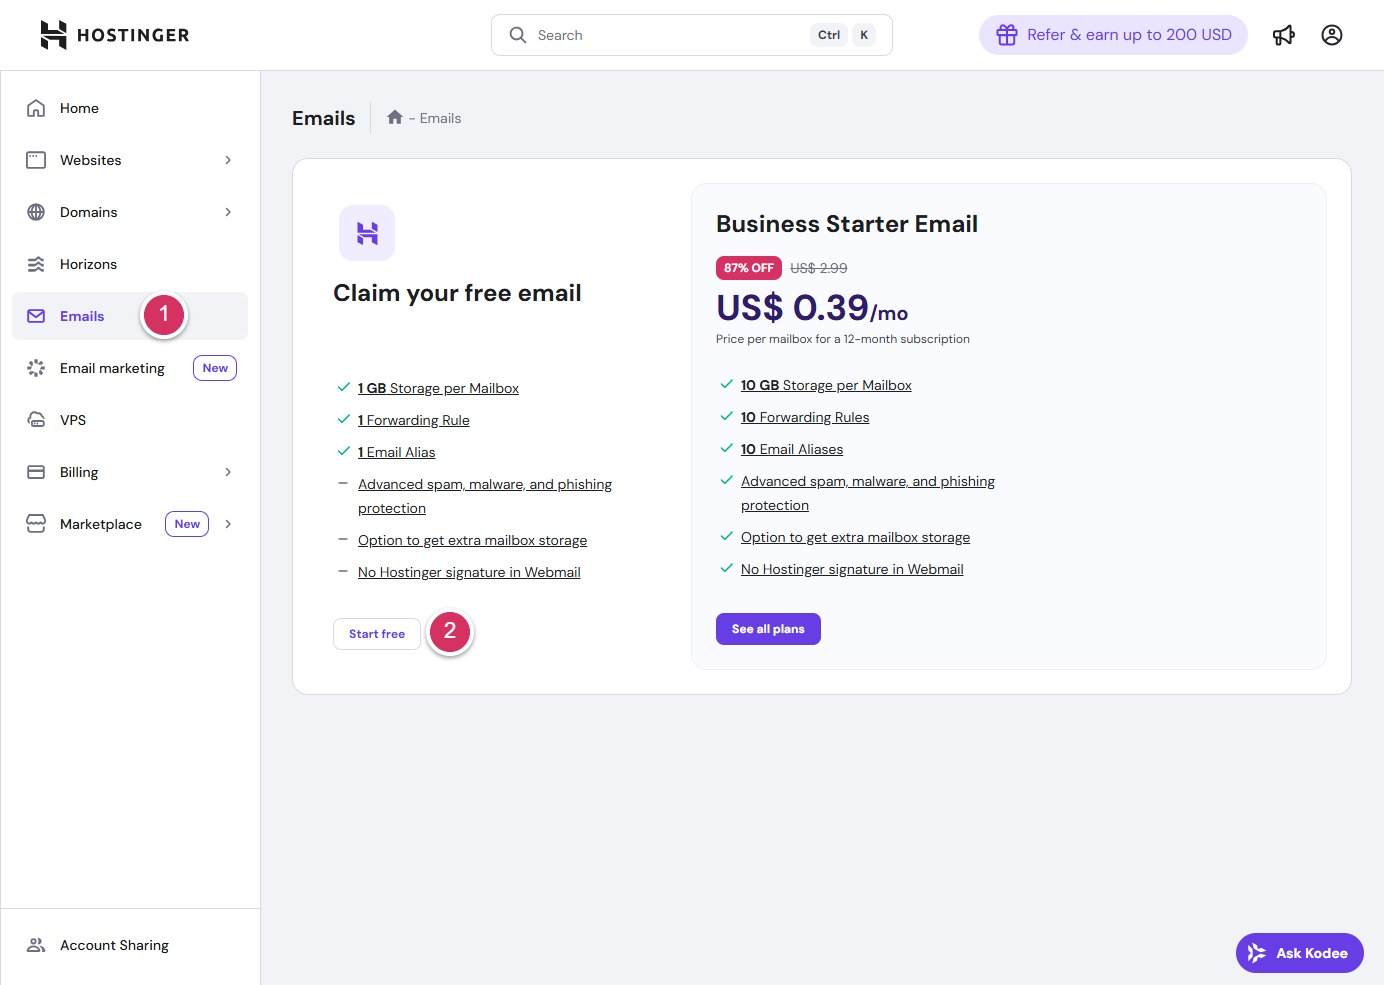
Apply for a free business email account

If you’ve already purchased a hosting plan, Hostinger will provide free business email service. Simply log into your control panel, click the Email menu on the left, select “Claim your free email” on the left, and click the “Get Start Free” button.
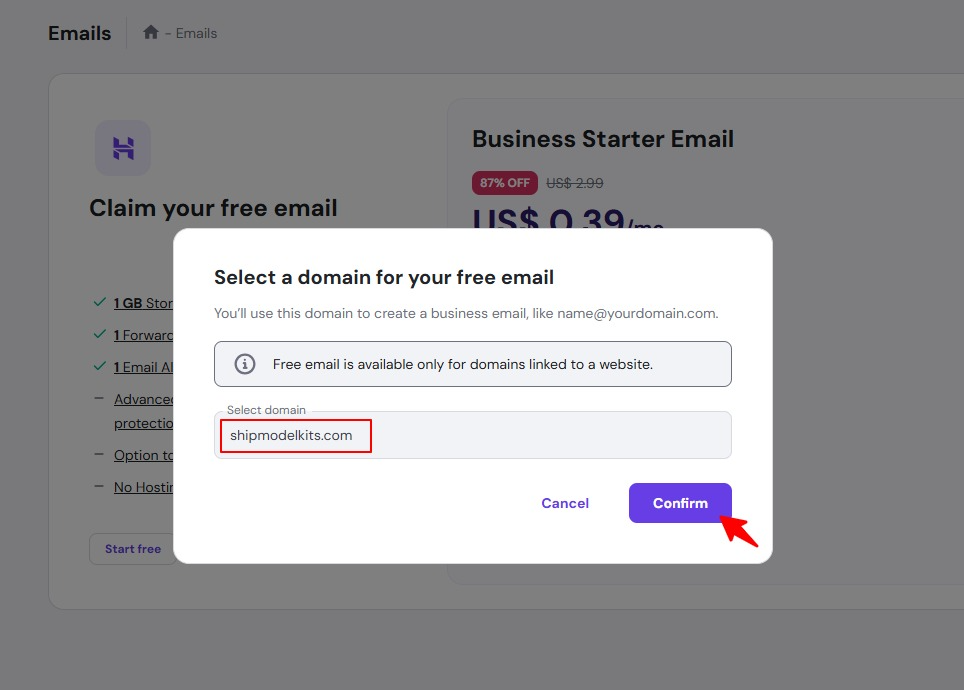
After clicking the Start Free button, select the domain(s) you wish to activate in the pop-up window, then click the Confirm button.
Click to start free trial
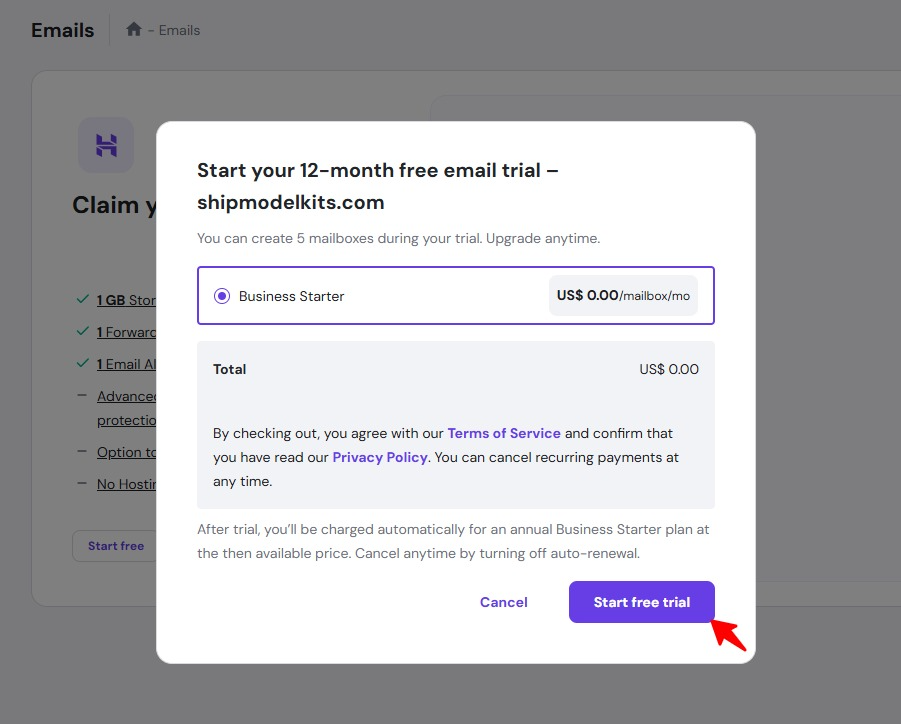
After clicking to start your free trial, you will be automatically redirected to the corporate email account management interface.
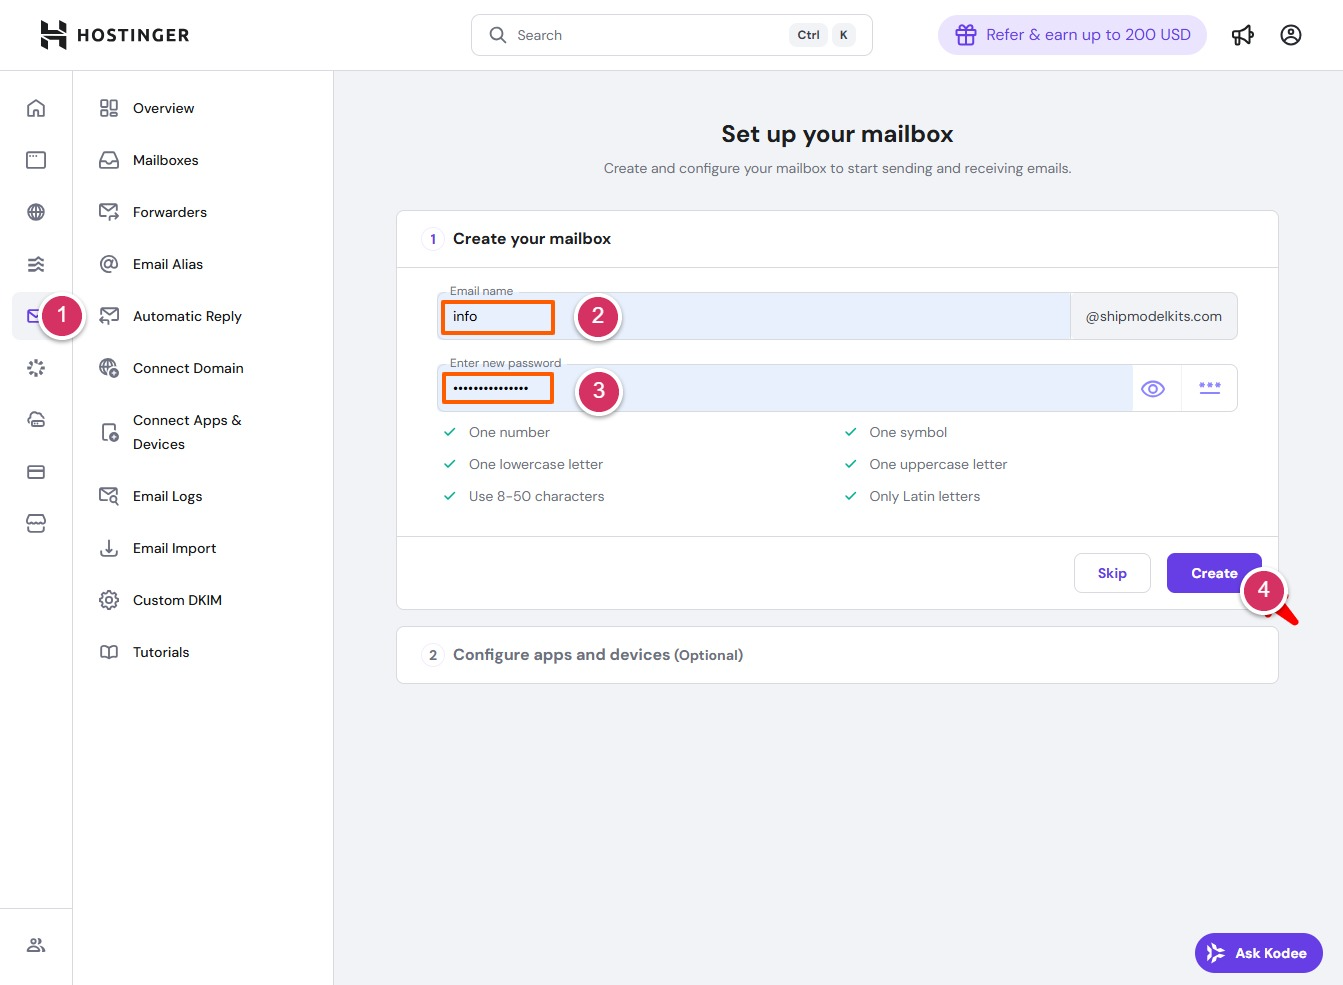
- Access the corporate email management interface
- Enter the email address—specifically, the part before the @ symbol that you entered as the administrator email address when installing WordPress.
- Enter the login password for this email account. It must be at least 8 characters long and include uppercase and lowercase letters, numbers, and special symbols. Keep this password secure after entering it.
- Click the Create button

After successfully creating your email account, you will be prompted to choose how you wish to access your email: via browser or app. The simplest option is to select browser login.
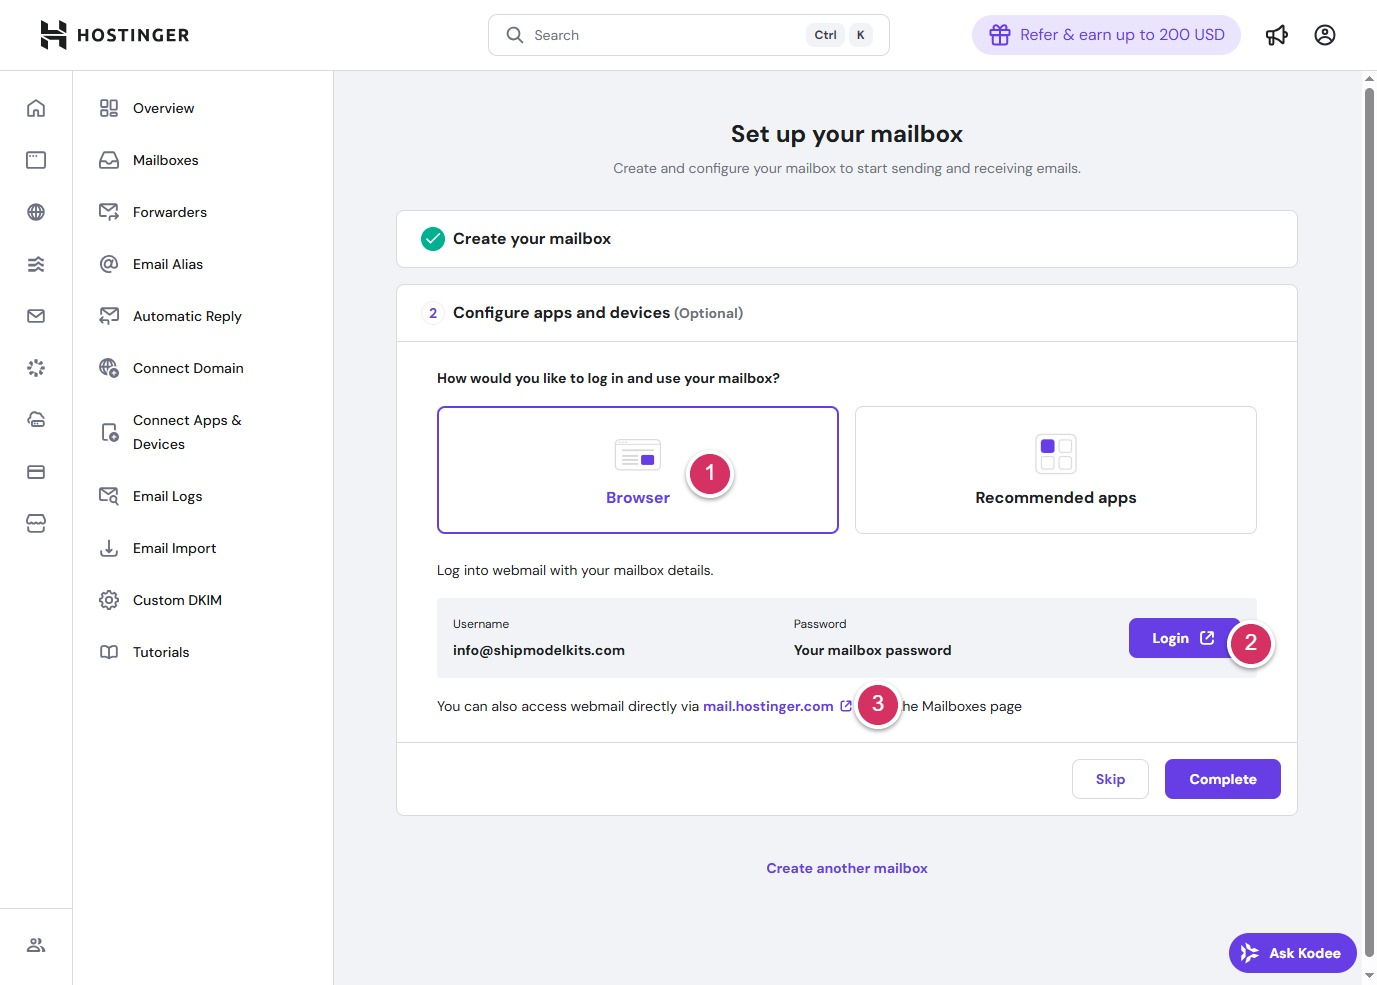
- Select browser to log in
- Clicking the login button will open the email login interface.
- You can also bookmark: mail.hostinger.com to log in to your email anytime later using this address.
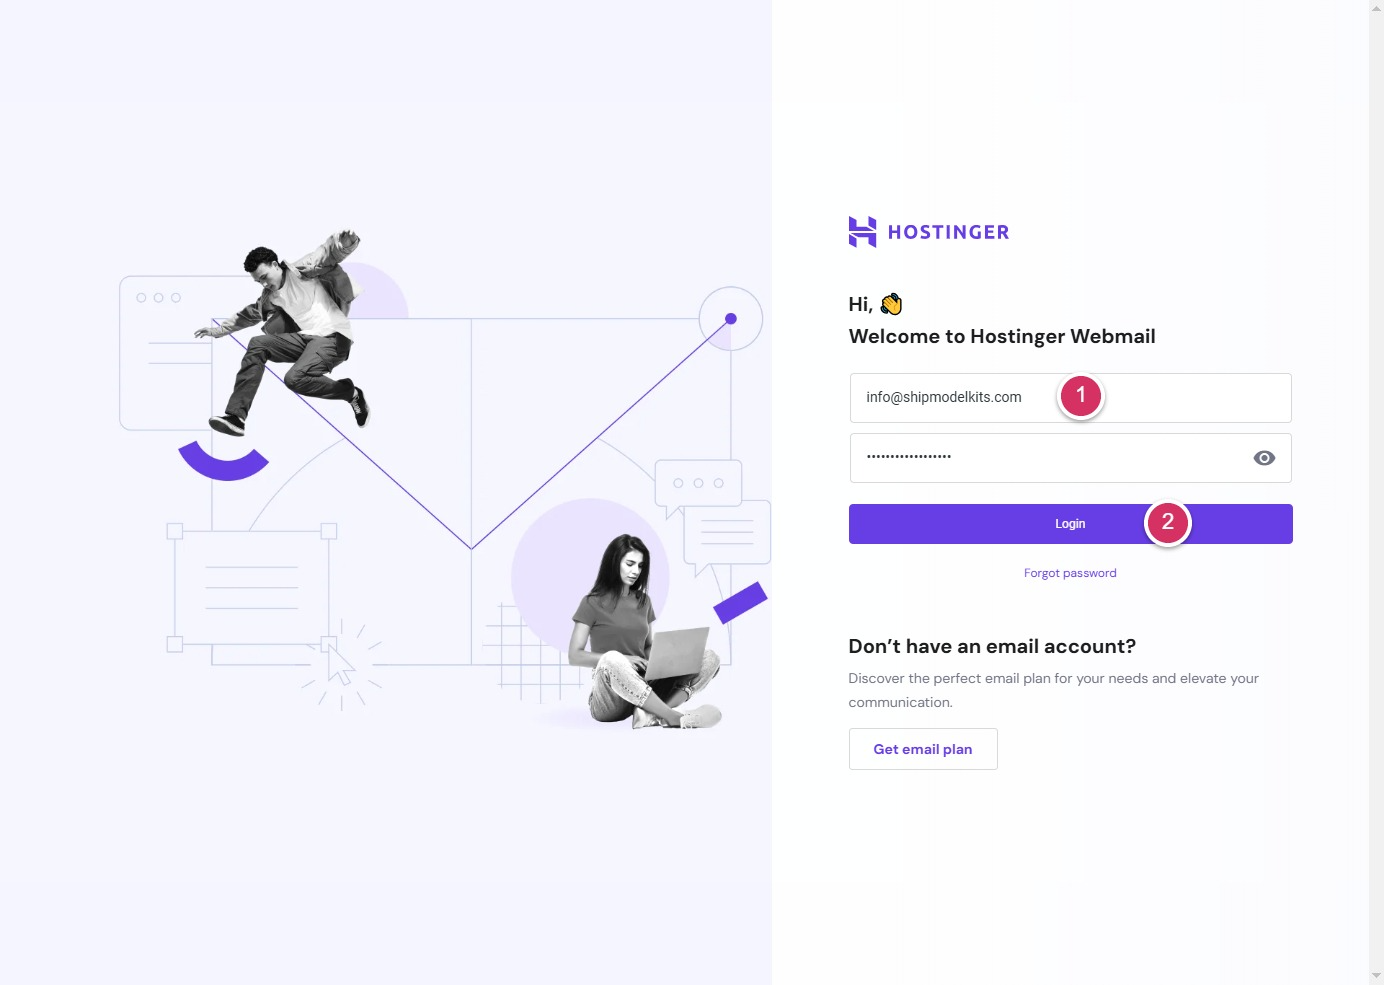
- After opening the email login window page, enter your email address and password.
- Click to log in and access your email inbox.
If you wish to change the language of your email account, please follow these steps:
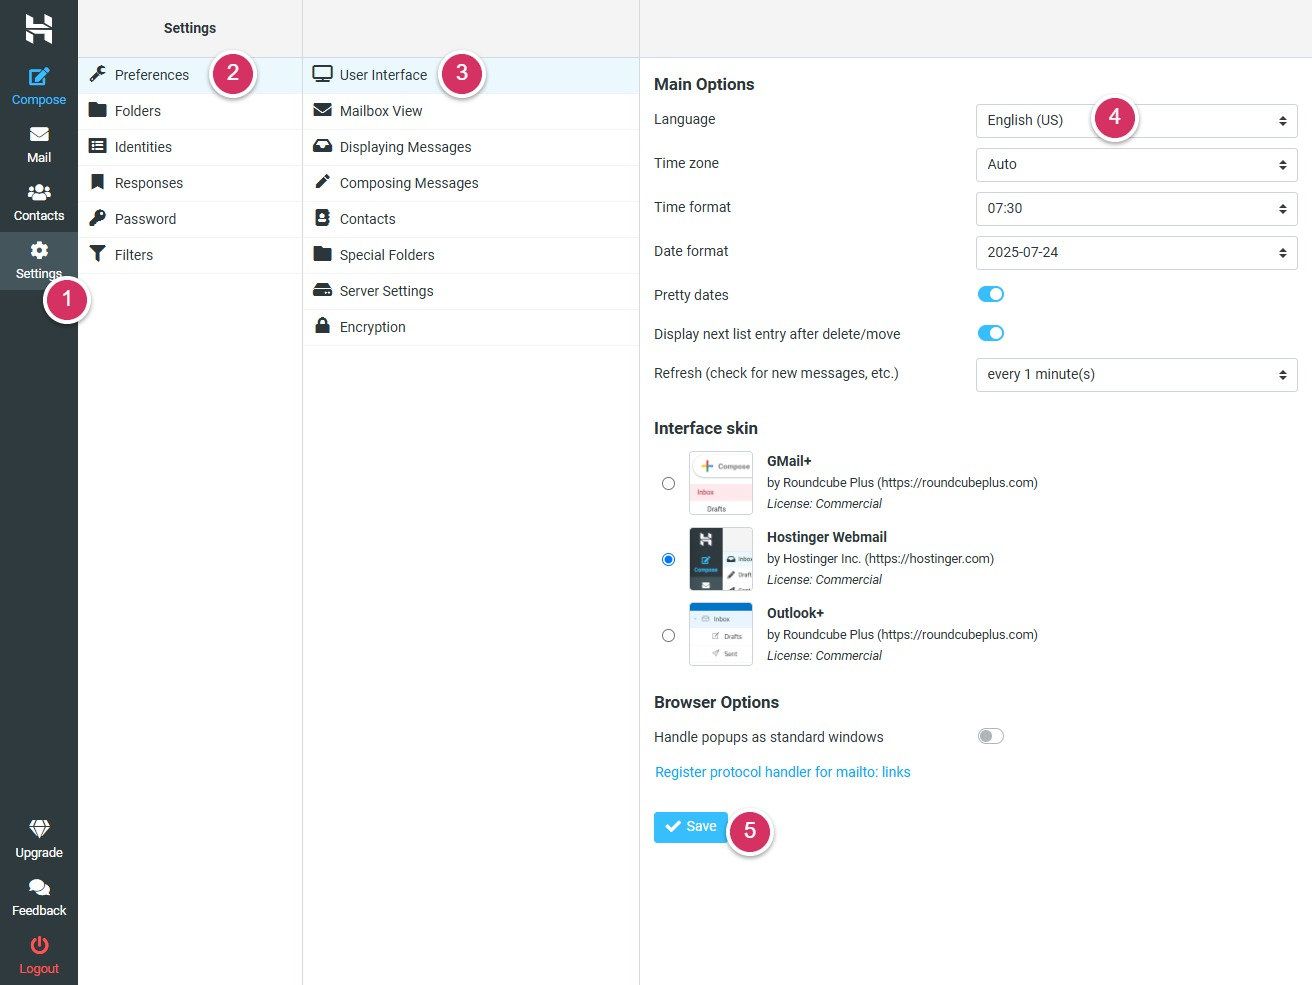
- Settings Menu
- Preferences
- User Interface
- Select language from the dropdown menu
- Click the Save button
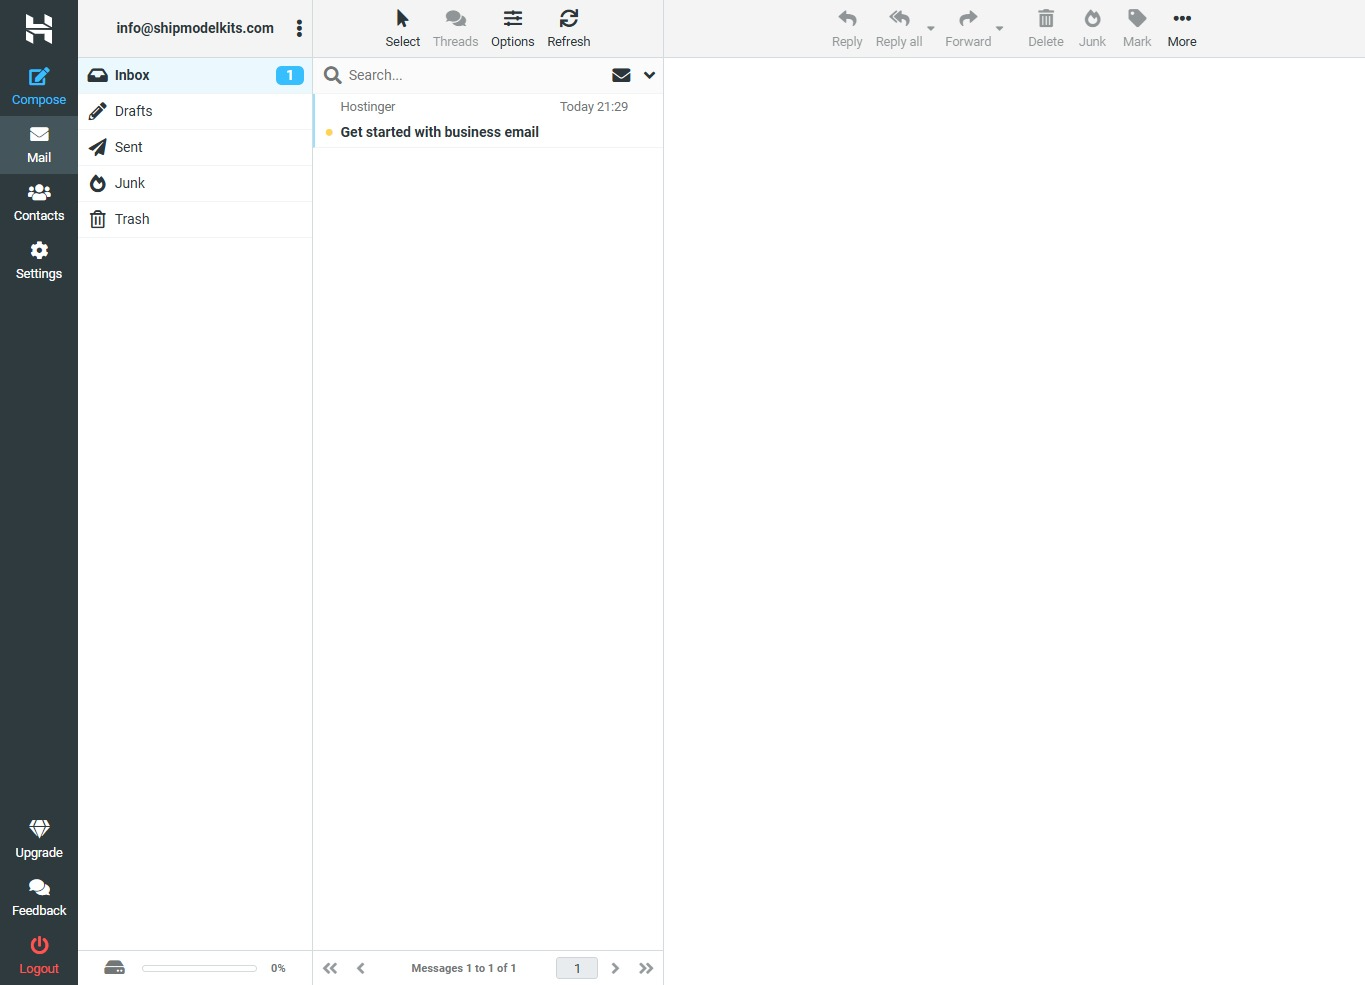
After completing the setup, you can send a test email to your other email addresses to see if it works properly.
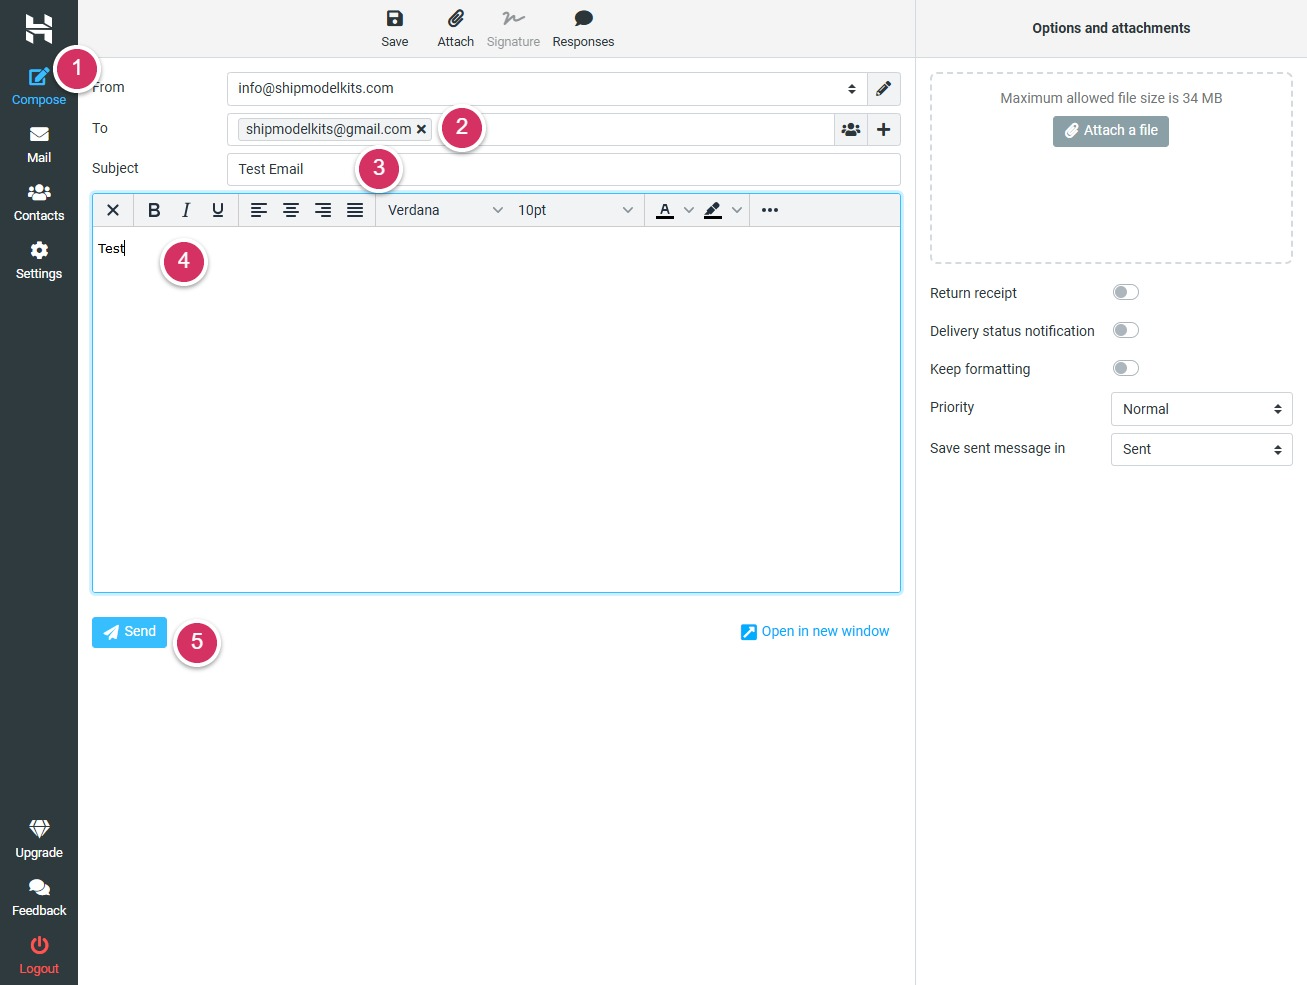
- Click the Compose menu on the left
- Enter the recipient’s email address
- Enter email subject
- Compose your email message. You can also browse and upload attachments through the window on the right.
- Click to send
After sending, log in to your test email account to check if you received the test email. If not, please check your spam folder—it’s likely that the first email from an unknown sender was flagged as spam.
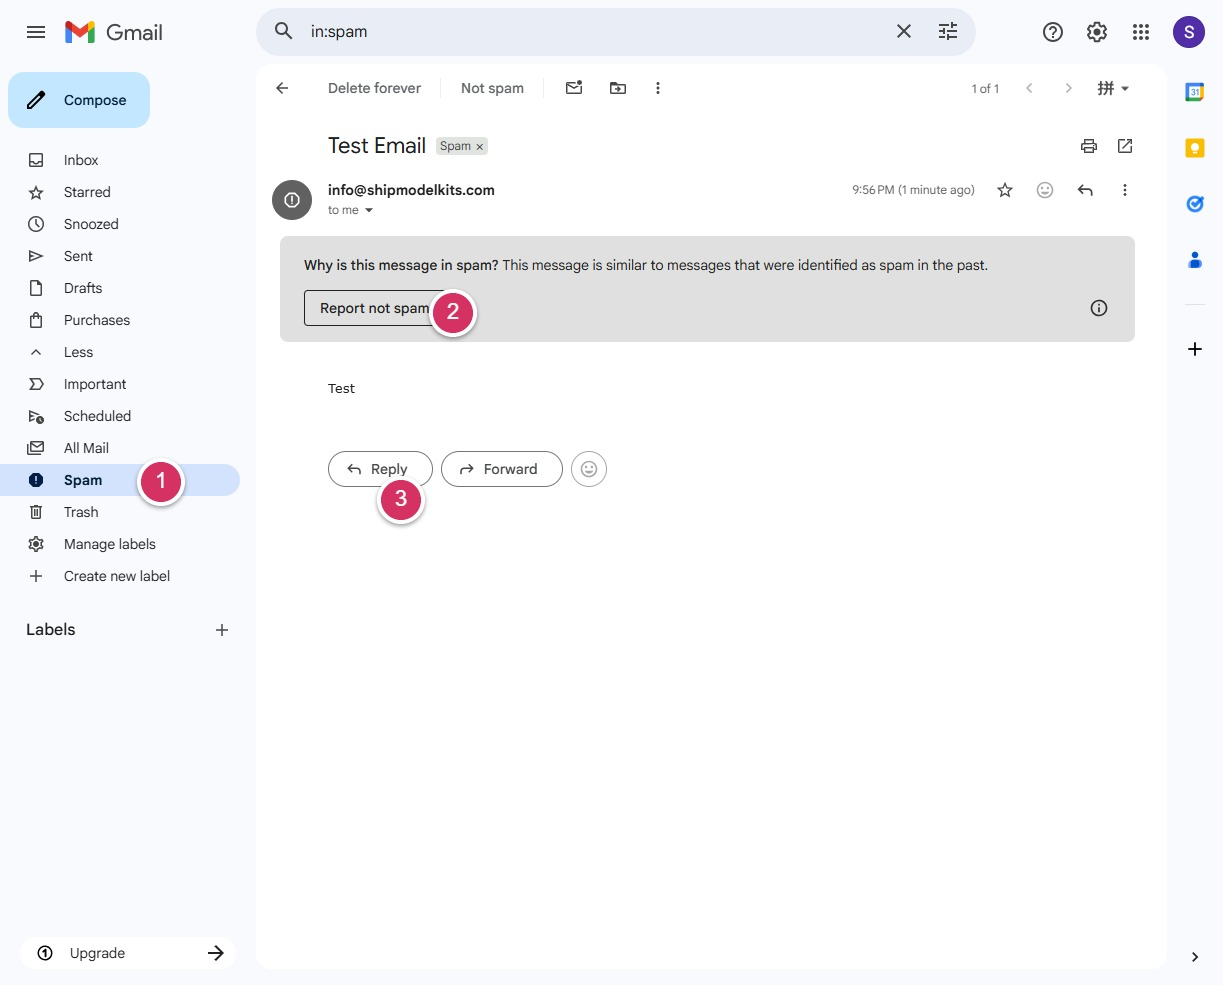
- Check for spam
- Click the button to report this as not spam.Return to your inbox to see the test email you just sent.
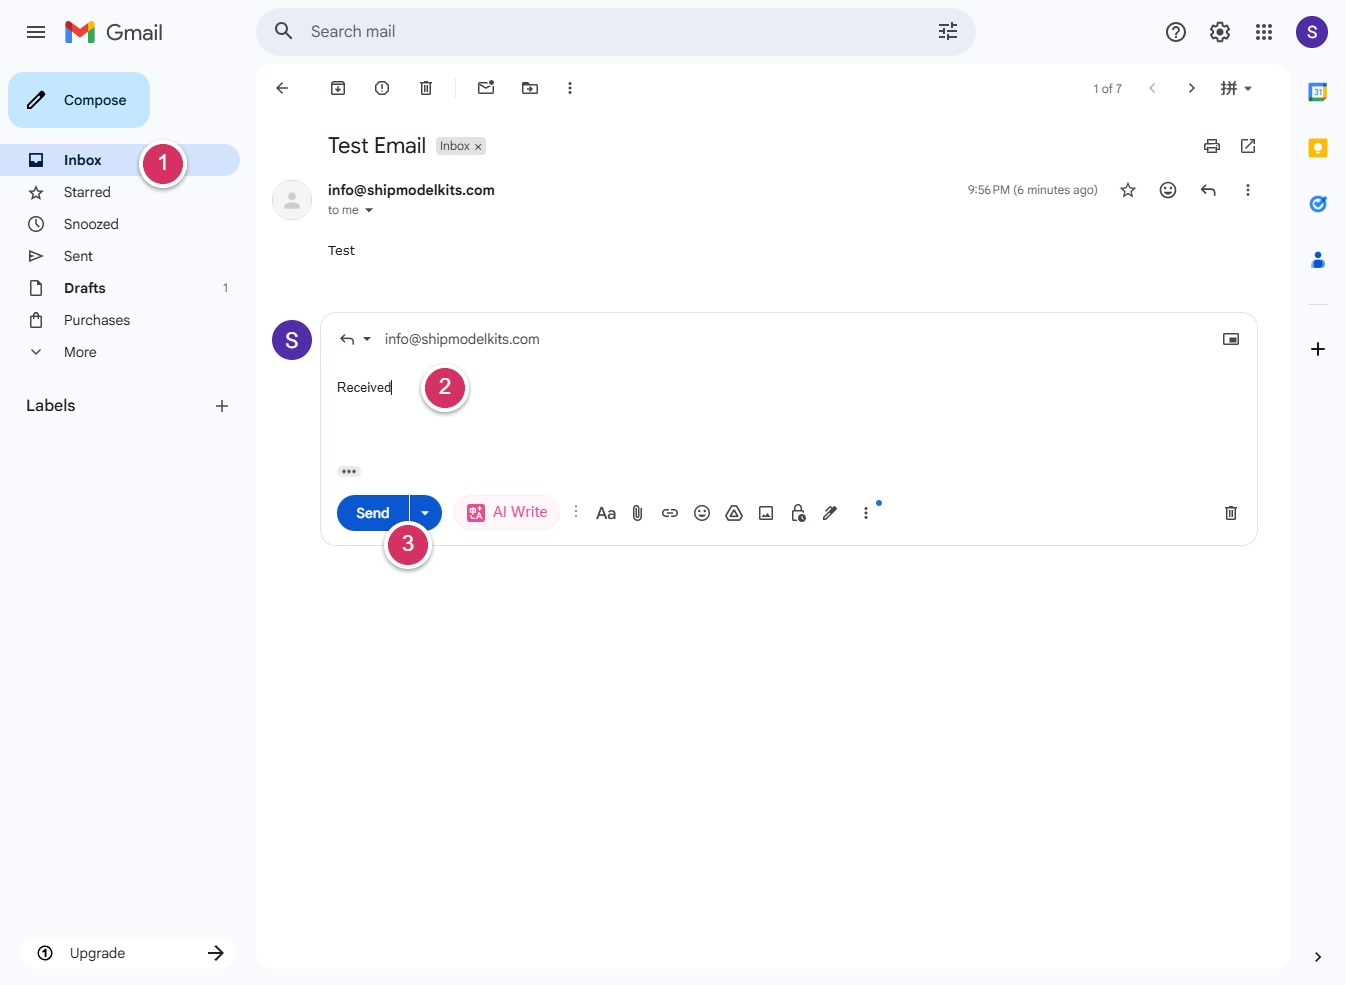
- Click the Inbox and open the test email, then click the Reply button.
- Enter any content
- Click the Send button
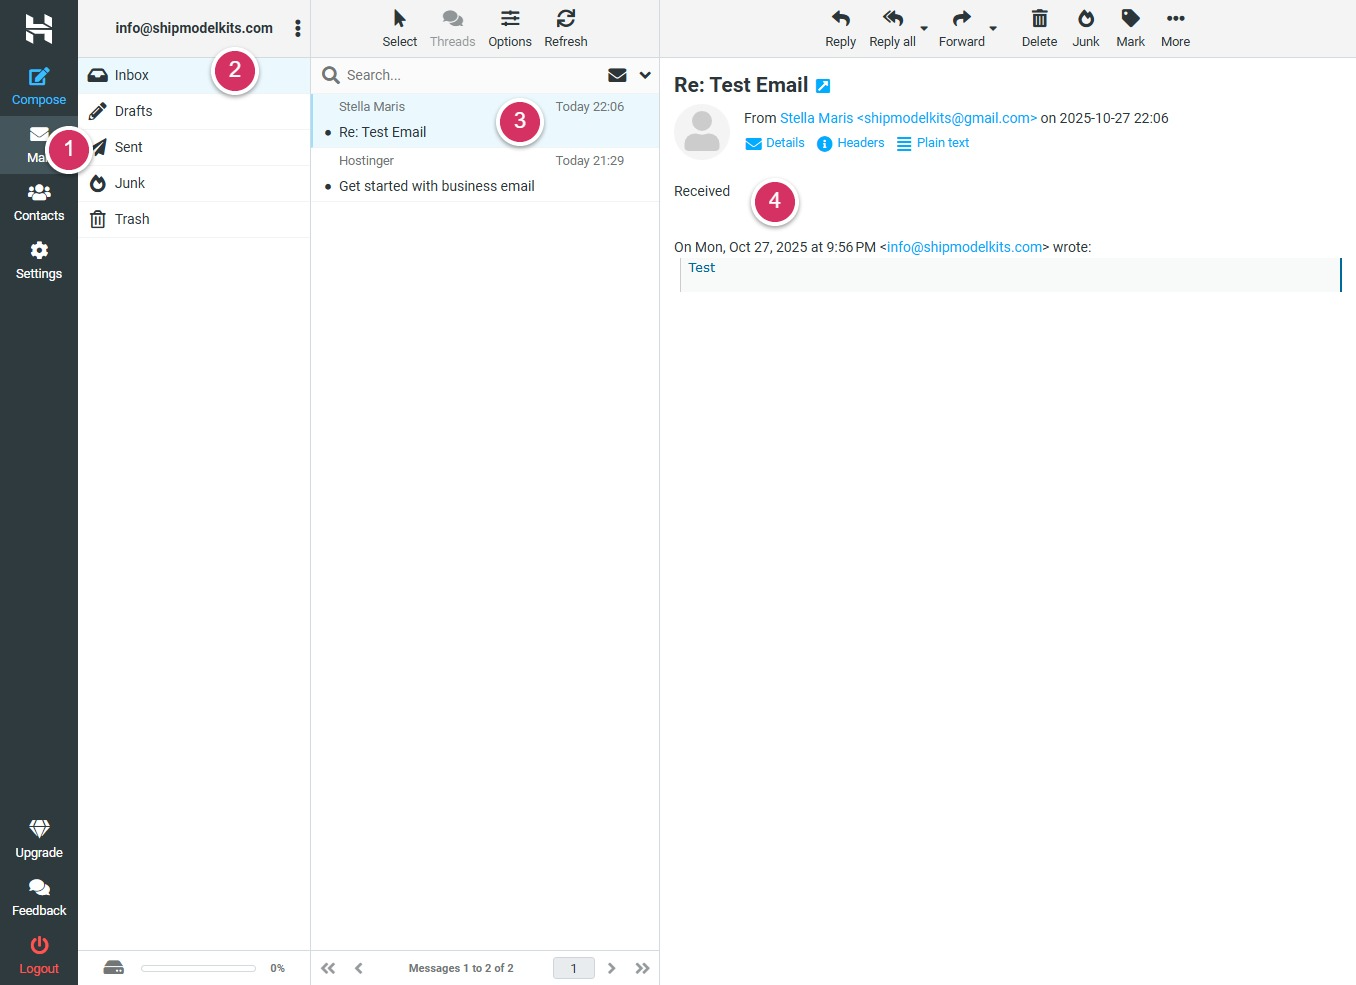
Return to the corporate email interface and check your inbox. If you receive a reply, it indicates that both sending and receiving functions are working properly for this email account, and you can use it with confidence. (Note that there may occasionally be delays, or check if the message ended up in the spam folder.)
Important Notice: Please keep your email login address, email account, and password safe. If lost, you can also modify or reset them through the Hostinger Email Management Panel.
Author Profile

- Freely.work Founder,15 years as a freelancer/digital nomad.Marketing consultant for Fortune Global 500 companies, digital marketing expert.
Latest entries
 December 17, 2025Mastering Google Search Console (GSC)
 December 16, 2025Yoast SEO Plugin: Overview, Benefits, and Installation Guide
 December 16, 2025What Is an SEO Plugin?
 December 2, 2025Adding Variable Products with Multiple Configurations