How to Deactivate and Delete WordPress Plugins
🧹 Keep your house (website) tidy by removing unnecessary plugins.
1. Why You Should Manage Unused Plugins
Just like a smartphone, installing too many apps can slow down a website’s performance. Therefore, you should remove any unnecessary plugins that don’t provide significant benefits.
As your WordPress site grows, you may test many plugins — some useful, some no longer needed.
Keeping unused or outdated plugins can:
- ⚠️ Slow down your website.
- ⚠️ Create security risks.
- ⚠️ Cause conflicts with other plugins or updates.
That’s why it’s good practice to deactivate and delete any plugin you’re not actively using.

2. Deactivate vs. Delete — What’s the Difference?
- Deactivate: Turns off the plugin’s functionality but keeps its files and settings on your website. You can reactivate it later anytime.
- Delete: Completely removes the plugin files from your server.
(Some settings or data may remain in your database, depending on the plugin.)
💡 Tip: Always deactivate before deleting a plugin.
3. How to Deactivate a Plugin
- Log in to your WordPress Admin Dashboard.
- Go to Plugins → Installed Plugins.
- You’ll see a list of all installed plugins.
- Find the plugin you want to stop using.
- Click the “Deactivate” link below the plugin’s name.
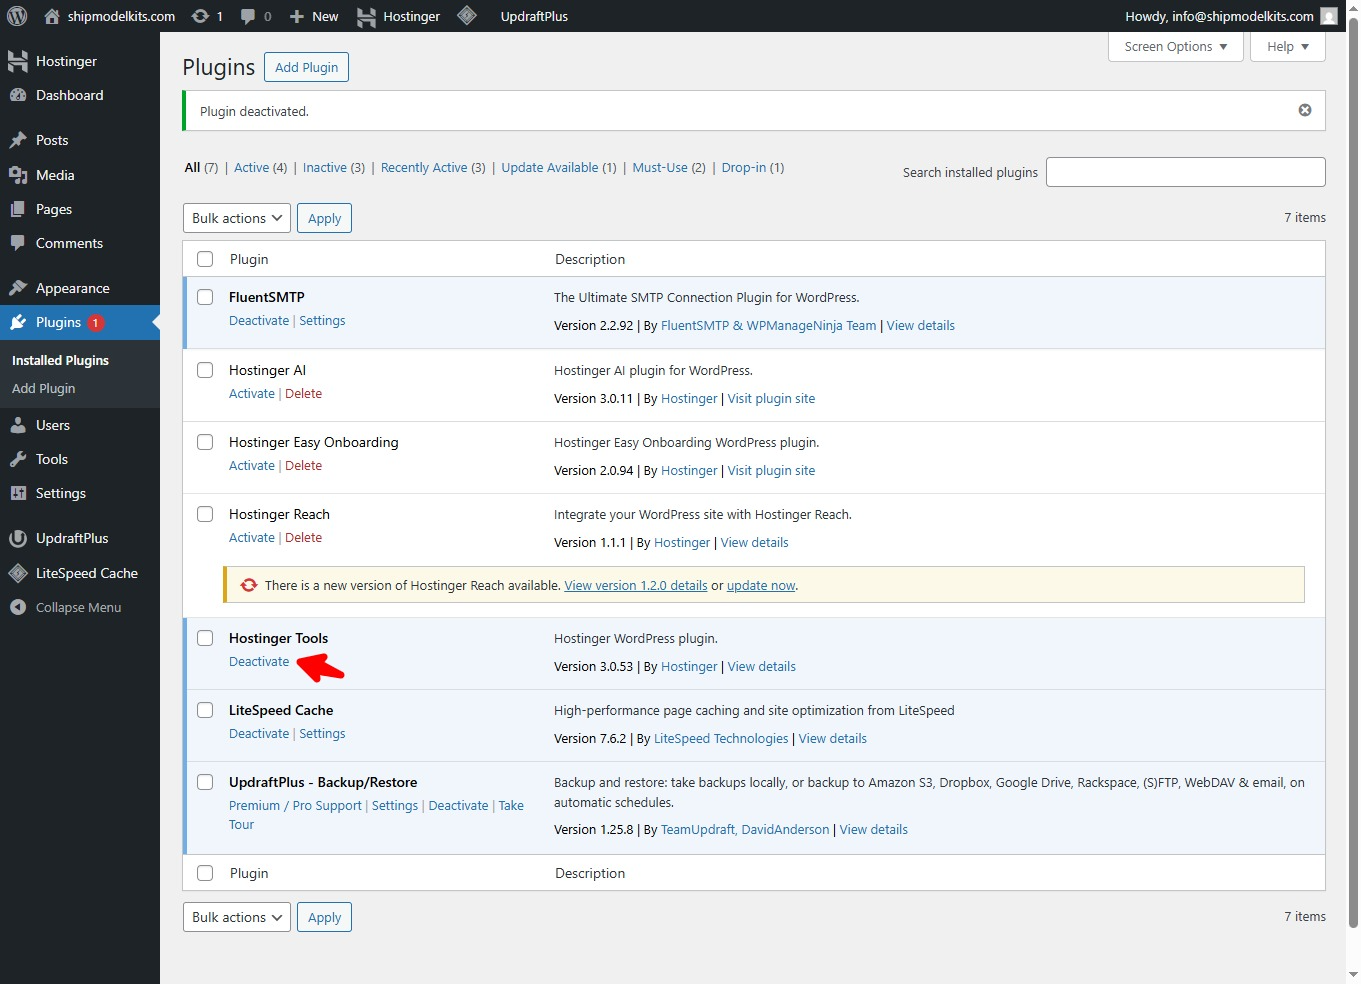
Once deactivated, the plugin will appear grayed out, and its features will no longer be active on your site.
4. How to Delete a Plugin
After deactivating the plugin:
- Return to Plugins → Installed Plugins.
- Locate the deactivated plugin you want to remove.
- Click “Delete.”
- Confirm when WordPress asks, “Are you sure you want to delete this plugin?”
- WordPress will remove this plugin files from your site’s
/wp-content/plugins/folder.
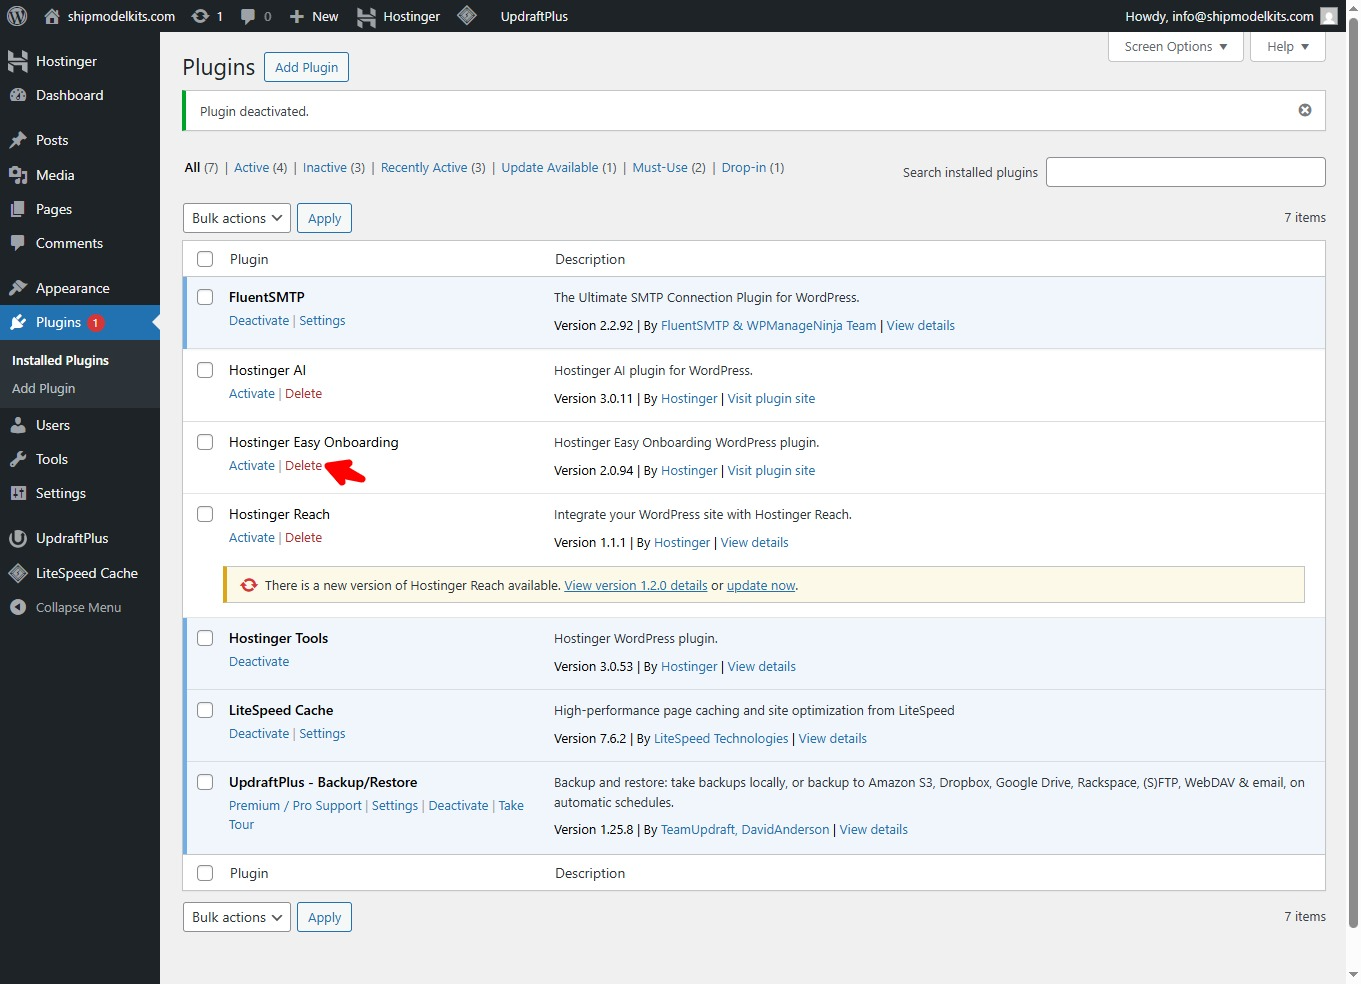
✅ Done! The plugin is now completely removed.
5. Important Tips Before Deleting
- 💾 Backup your website first (use a plugin like UpdraftPlus) in case you need to restore something later.
- 🧩 Check dependencies: Some plugins rely on others — deleting one may affect the rest.
- 🔐 Keep your core plugins only: Such as security, backup, caching, and SEO plugins.
- 🧠 Clean database (optional): Use a database optimizer (like WP-Optimize) to remove leftover plugin data.
6. 🔄 How to Update WordPress Plugins and What to Watch Out For
Keeping your plugins up to date is just as important as deleting unused ones.
Updates often include security patches, new features, and performance improvements that keep your website safe and stable.
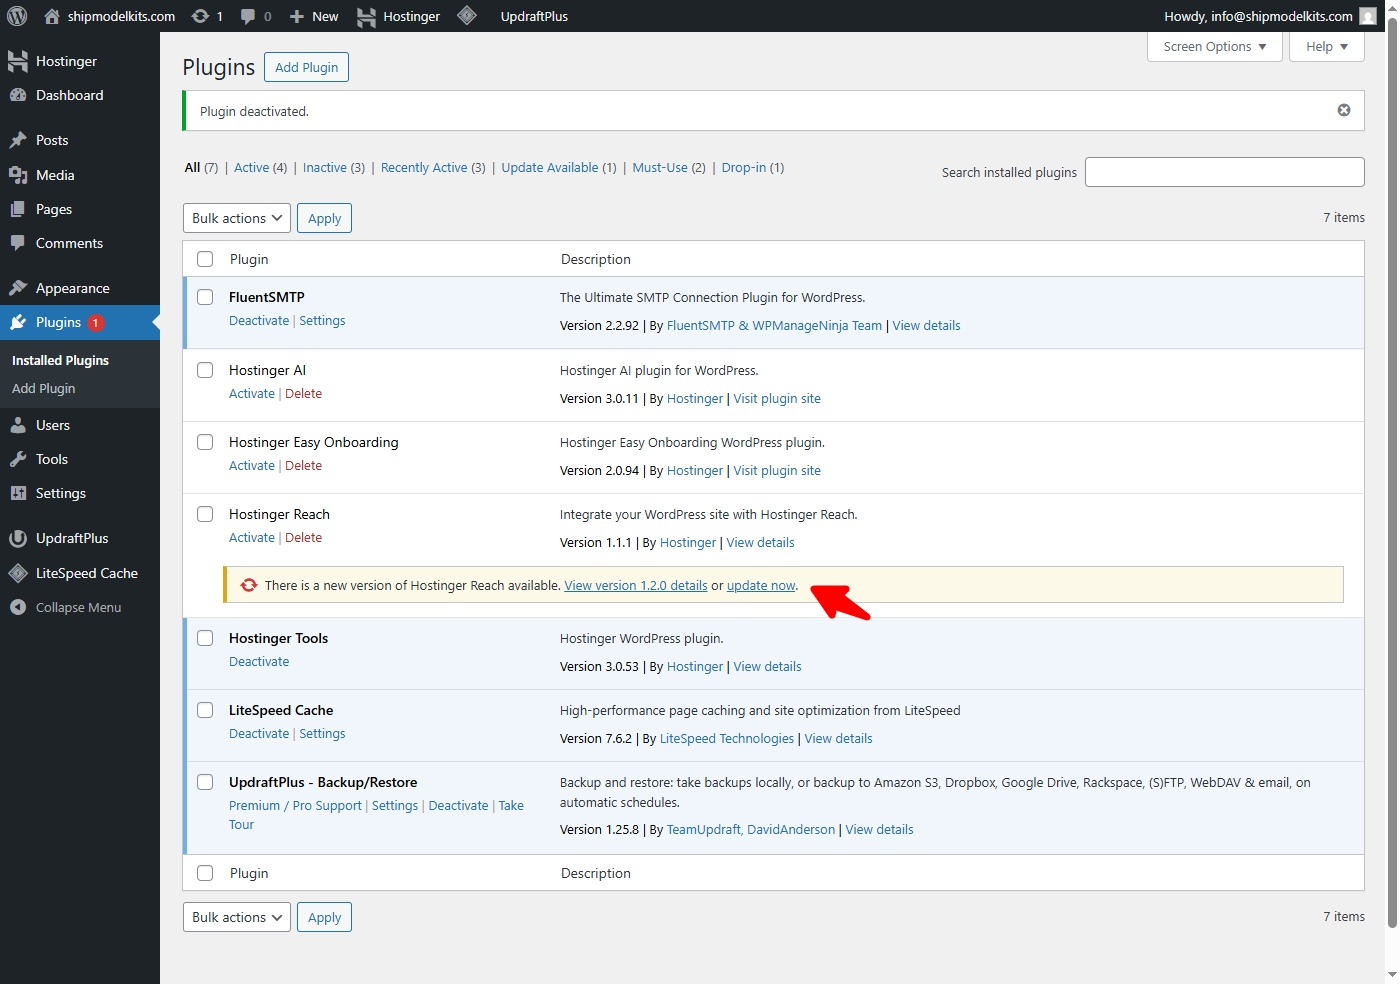
🧭 How to Update Plugins
- Go to Dashboard → Updates, or open Plugins → Installed Plugins.
- You’ll see a list of plugins with available updates.
- Click “Update Now” under each plugin, or select multiple and click “Update Plugins.”
- Wait until the process finishes — do not close the page while updating.
⚠️ Important Tips
- 💾 Always back up your website before updating (especially major plugins like WooCommerce or Elementor).
- 🧩 Check compatibility with your WordPress core version.
- 🕓 Update one plugin at a time if your site is large or uses complex integrations.
- 🧰 Avoid auto-updating critical plugins unless you trust the developer and test updates first.
- 🔍 Clear cache after updates to ensure your site displays the latest changes.
Note: When your website experiences unexplained errors, missing features, or layout issues, recall if you’ve recently installed any new plugins. It’s likely caused by plugin incompatibility. You can troubleshoot by deactivating plugins one by one to identify the culprit. Disable that plugin or search for an alternative plugin with similar functionality to replace it.
💡 Pro Tip: Schedule regular plugin checks — weekly or biweekly — to keep your WordPress installation healthy and secure.
7. Summary
| Step | Action | Description |
|---|---|---|
| 1️⃣ | Go to Plugins → Installed Plugins | View all plugins |
| 2️⃣ | Click Deactivate | Turn off plugin functionality |
| 3️⃣ | Click Delete | Remove plugin files completely |
| 4️⃣ | Confirm and refresh | Plugin is removed from your site |
By now, you have mastered the entire process of searching for, installing, activating, configuring, deactivating, and deleting plugins in WordPress. You are now free to expand your website’s functionality.
✅ Key Takeaway
Regularly reviewing and cleaning up your plugins keeps your WordPress site fast, secure, and stable.
Only keep the plugins that are active, updated, and essential to your website’s function.
“Good plugin management is like digital housekeeping — fewer tools, faster performance.”
Author Profile

- Freely.work Founder,15 years as a freelancer/digital nomad.Marketing consultant for Fortune Global 500 companies, digital marketing expert.
Latest entries
 December 17, 2025Mastering Google Search Console (GSC)
 December 16, 2025Yoast SEO Plugin: Overview, Benefits, and Installation Guide
 December 16, 2025What Is an SEO Plugin?
 December 2, 2025Adding Variable Products with Multiple Configurations