How to Purchase and Download Themes
After selecting your ideal WordPress theme through the demo site, the next step is purchasing and downloading the theme files. This process is simple, but it’s important to understand what exactly you’re buying and which files to download for proper installation later.
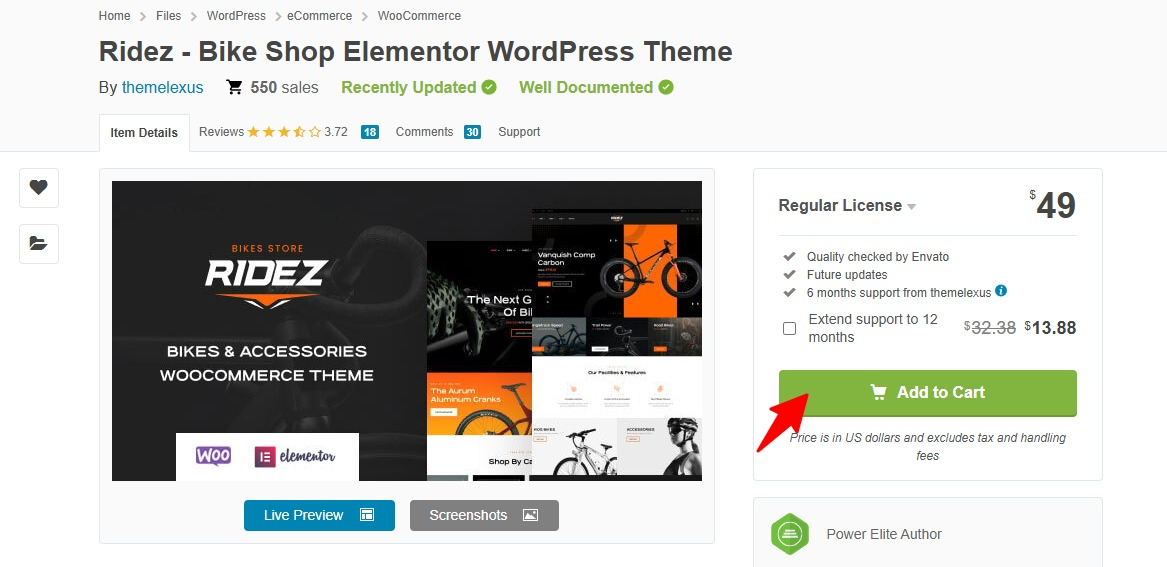
🛒 1. Purchasing the Theme
Most premium WordPress themes are sold through ThemeForest.net or the developer’s official website.
Let’s take ThemeForest as an example — one of the largest and most trusted marketplaces for WordPress themes.
Steps to purchase:
- Register an account at ThemeForest.net.
- Log in and search for the theme name (e.g., “Ridez”).
- On the theme’s product page, review details such as:
- Theme description and version history
- User ratings and reviews
- Supported plugins and updates
- Licensing terms (Regular vs Extended License)
- Click “Buy Now” and complete the payment using your preferred method (credit card, PayPal, etc.).
Once payment is confirmed, your theme will appear in your “Downloads” section of your account dashboard.
📁 2. Downloading the Theme Files
After purchase, go to:
👉 ThemeForest → Profile → Downloads
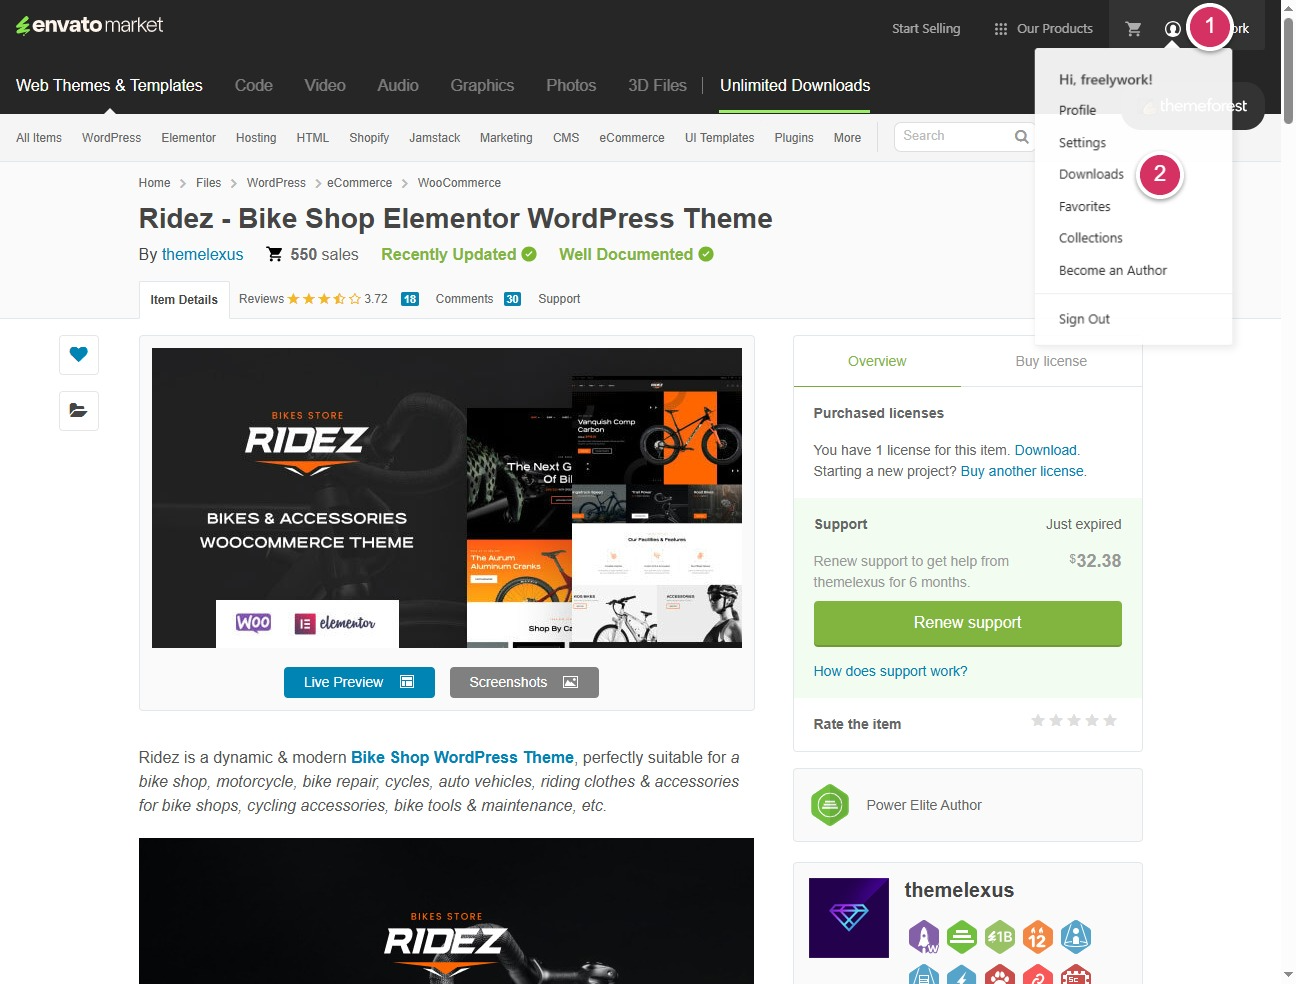
You will see several download options for your purchased theme. It’s important to know the difference:
| Option | Description |
|---|---|
| Download All Files & Documentation (ZIP) | Contains the complete package — theme files, documentation, demo data, child theme, and license information. Recommended for backup and installation reference. |
| Installable WordPress File Only (ZIP) | The main theme file that you can directly upload to WordPress under Appearance → Themes → Add New → Upload. |
| License Certificate & Purchase Code (TXT or PDF) | Includes your license information and unique purchase code (license key). This code is required for theme activation and updates. Make sure to save it securely. |

💡 Tip: Always download both the full package and the license file for future use.
🔑 3. Understanding the License and Purchase Code
Each purchase comes with a unique license key, also known as the purchase code.
This code allows you to:
- Verify your theme ownership
- Activate automatic updates
- Access customer support
📄 To find it:
- Open the file named “License Certificate & Purchase Code” (TXT or PDF format).
- Locate the line starting with “Item Purchase Code:” followed by a long alphanumeric string.
Keep this code confidential — it identifies your purchase and prevents unauthorized use.
🧭 4. Before Installation
Before uploading the theme to your WordPress site:
- Unzip the All Files package and locate the installable ZIP file (usually named after the theme, e.g.,
ridez.zip). - Review the included documentation for specific installation steps, demo import guides, and plugin setup instructions.
✅ 5. Summary
Purchasing and downloading your WordPress theme is a straightforward but critical process.
Always make sure you:
- Buy from a reputable source
- Download both the installable theme and license file
- Keep your purchase code safe for future updates and support
Once your files are ready, you can move on to the next step — installing and activating your theme inside WordPress.
💡 Pro Tip:
Create a dedicated folder on your computer (e.g., My WordPress Themes) to store all purchased theme files, license certificates, and documentation — this will save you time and trouble when managing multiple projects in the future.
Author Profile

- Freely.work Founder,15 years as a freelancer/digital nomad.Marketing consultant for Fortune Global 500 companies, digital marketing expert.
Latest entries
 December 17, 2025Mastering Google Search Console (GSC)
 December 16, 2025Yoast SEO Plugin: Overview, Benefits, and Installation Guide
 December 16, 2025What Is an SEO Plugin?
 December 2, 2025Adding Variable Products with Multiple Configurations