Building a website is like doing business in the digital world. The hosting serves as your virtual shop or office building, while the domain is your online address and brand gateway—it’s how people find you. Therefore, choosing the right hosting and domain is the foundation for creating a high-performance and reliable website. In this unit, you’ll gain a comprehensive understanding of server types, hosting configurations, domain strategies, and registration management**. You’ll learn how to achieve maximum stability and search-engine friendliness at the lowest possible cost.
Apply for and activate your corporate email account
Corporate email accounts use the company's official website domain as their suffix, maintaining consistency with the corporate brand to build a stronger brand image and enhance user trust.
Once the hosting is purchased, it's equivalent to securing a rental property. The next step involves basic functional planning, namely installing the core website program.
WordPress consists of three main components: the core framework (the bare-bones structure), plugins (functional extensions), and themes (visual styling and layout).
WordPress themes are like interior design plans for a house—they determine the layout, style, and aesthetic, ultimately shaping the visual impression and experience your website delivers to visitors.Designing or selecting a theme that aligns with your product and brand identity is crucial, as it conveys your aesthetic.is one of the key factors in winning over customers.
✅ Installing a WordPress Theme and Importing Demo Data (Using Ridez as an Example)
Before installing a theme, it is strongly recommended that you first create a backup using the previously installed UpdraftPlus plugin. This ensures that if any issues arise or you decide to switch to a different theme, you can quickly restore your site to its state prior to installing the theme.
🧭 Step 1. Find the Correct Theme Installation Package
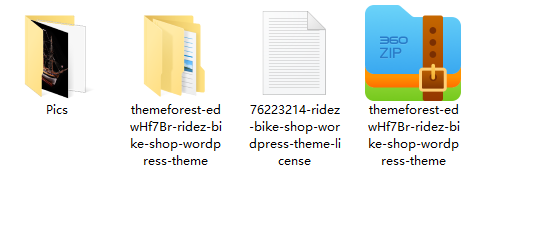
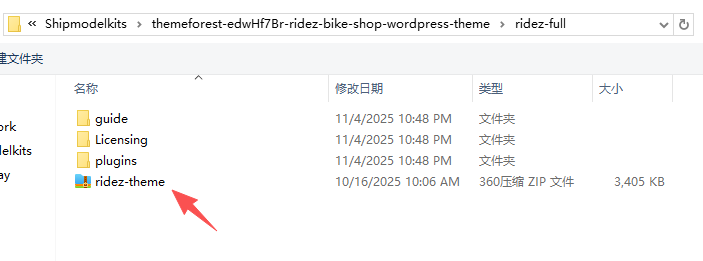
After purchasing and downloading the theme from ThemeForest, you’ll receive a ZIP file that includes several folders such as:
Documentation/
Licensing/
Demo Content/
ridez.zip (this is the actual theme installation file)
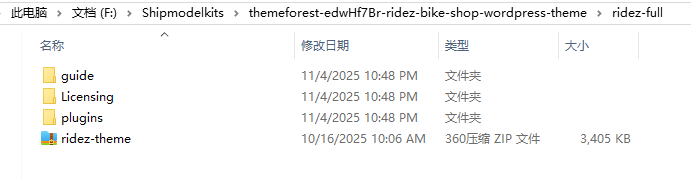
After decompression, you will obtain the following files:
That zip file is the theme installation package. Some themes may also be located within the Theme directory. In any case, you need to locate the zip installation package named after the theme.
👉 Common Mistake: Many beginners directly upload the entire downloaded package and encounter this error:
“The package could not be installed. The theme is missing the style.css stylesheet.”
This happens because the main ZIP file is a bundle containing multiple resources.
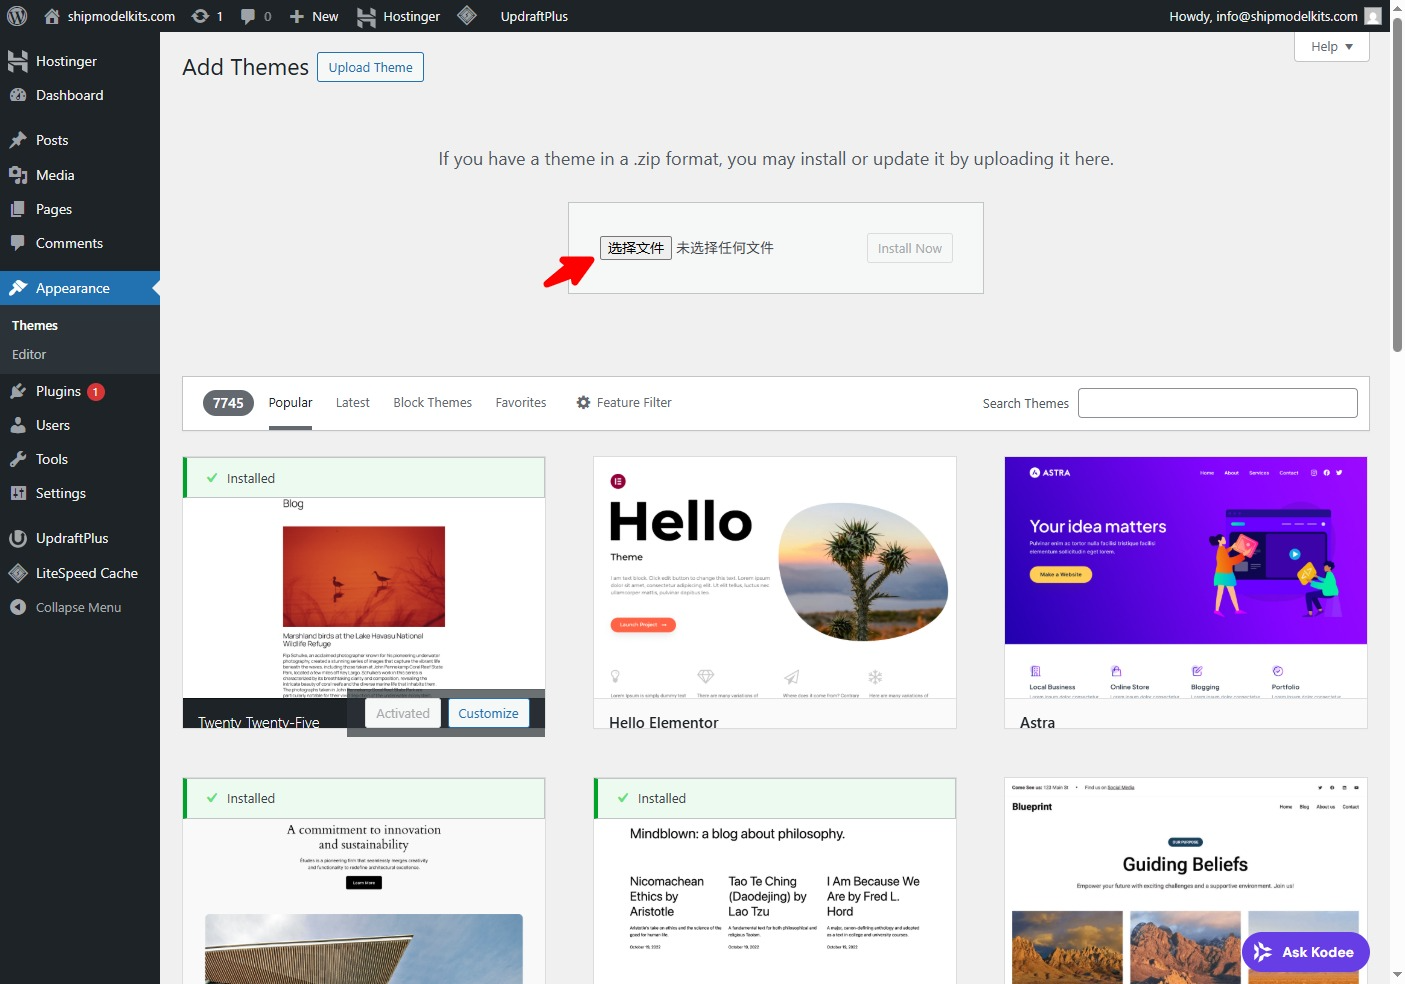
✅ Correct Approach: Unzip the package first, locate the actual theme ZIP file (ridez.zip), and then upload it via Dashboard → Appearance → Themes → Add New → Upload Theme.
⚙️ Step 2. Theme Installation
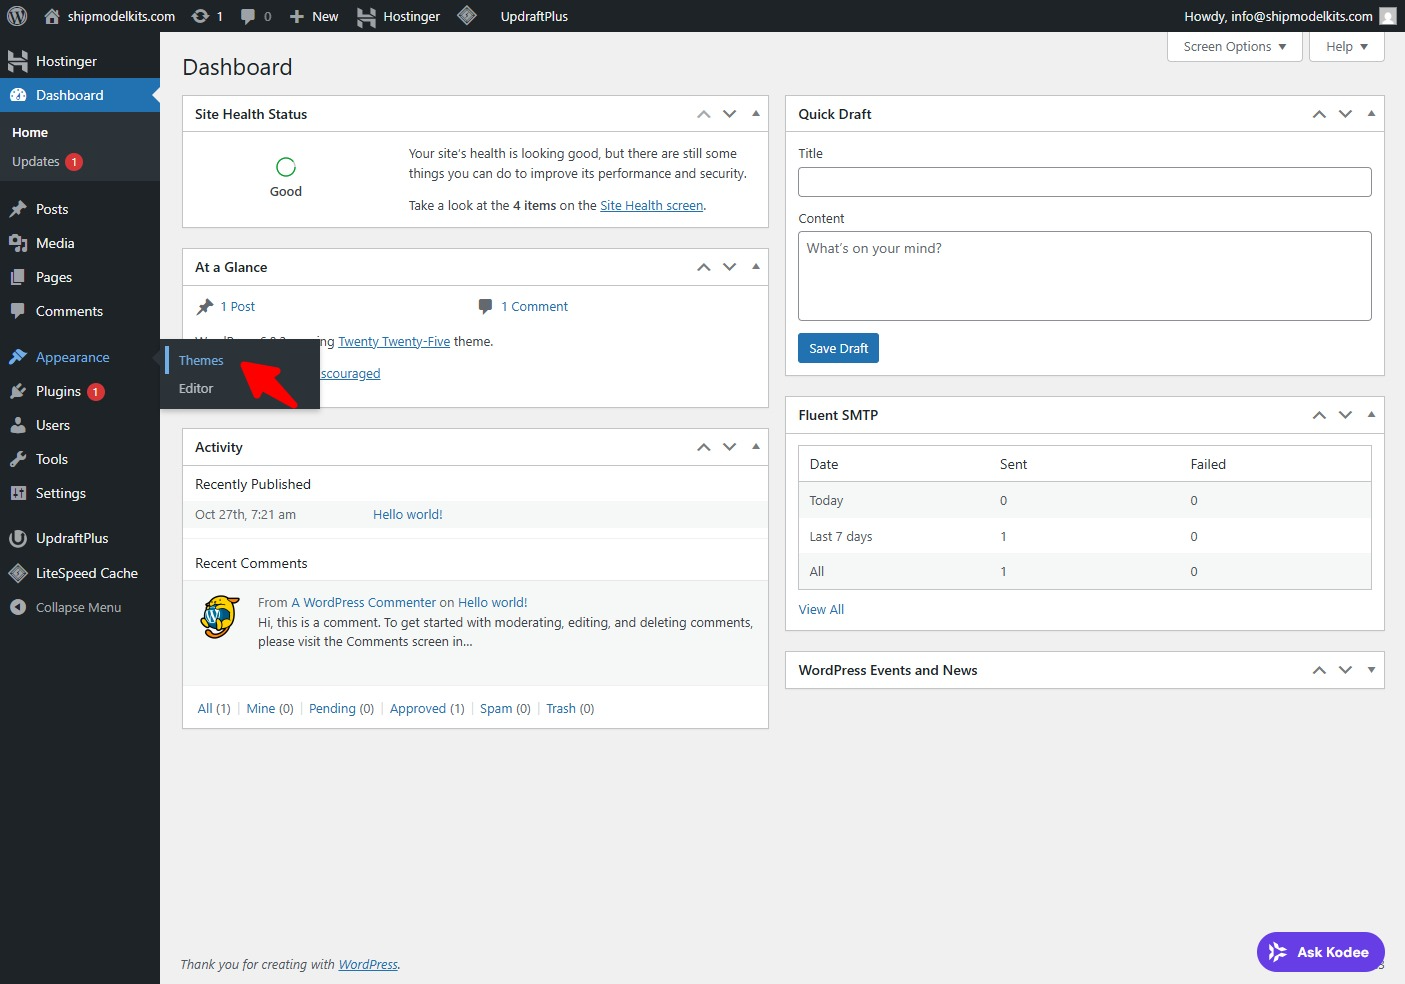
Access your website’s admin dashboard
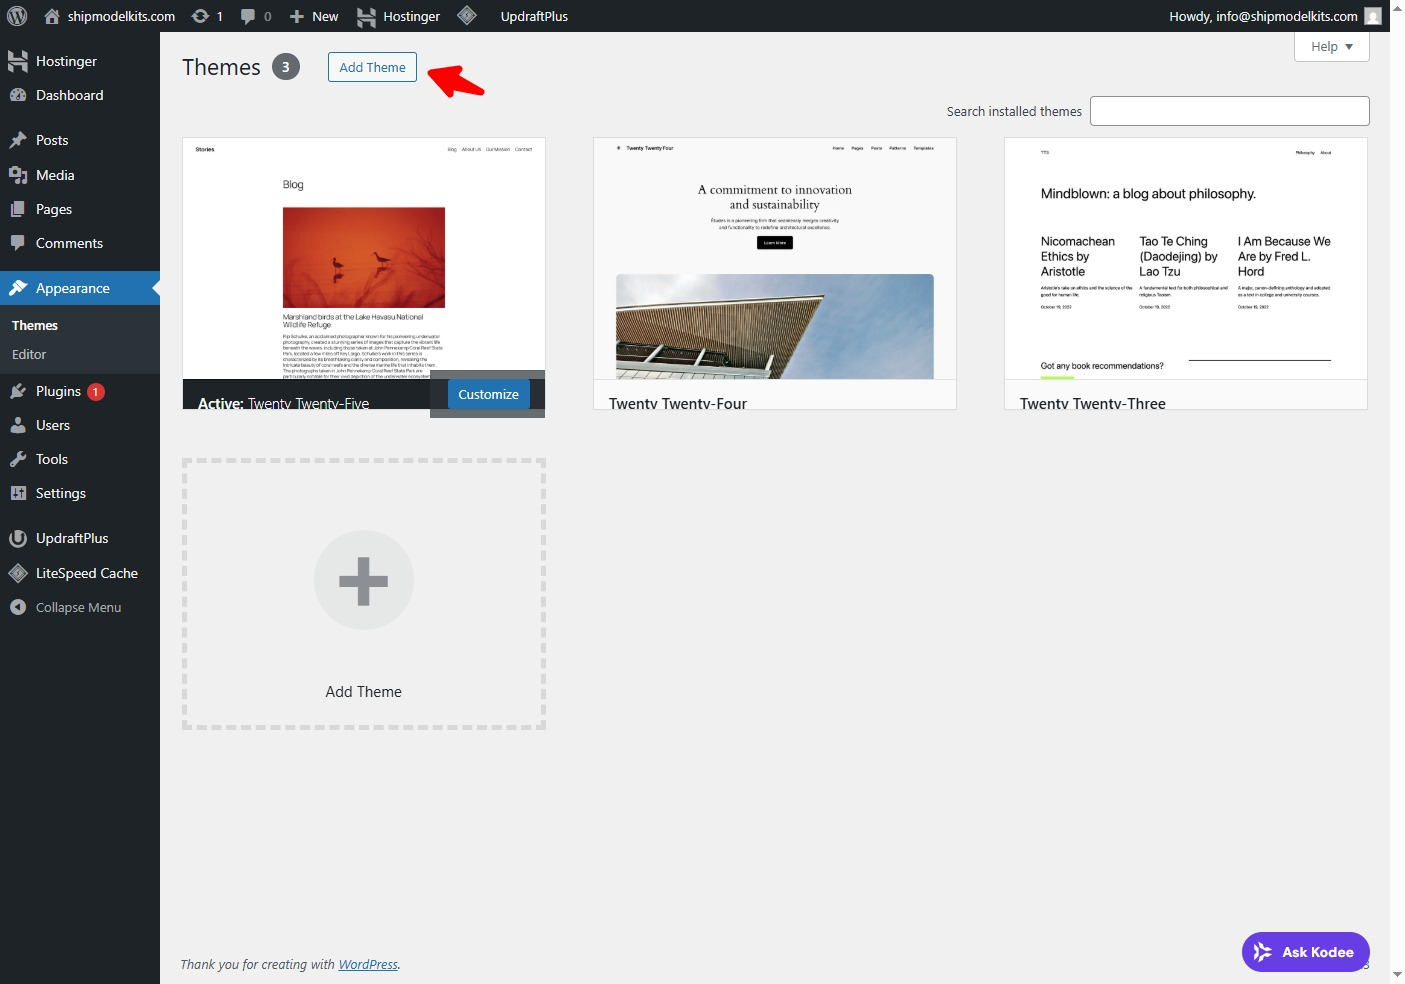
Go to Appearance → Themes → Add New → Upload Theme.
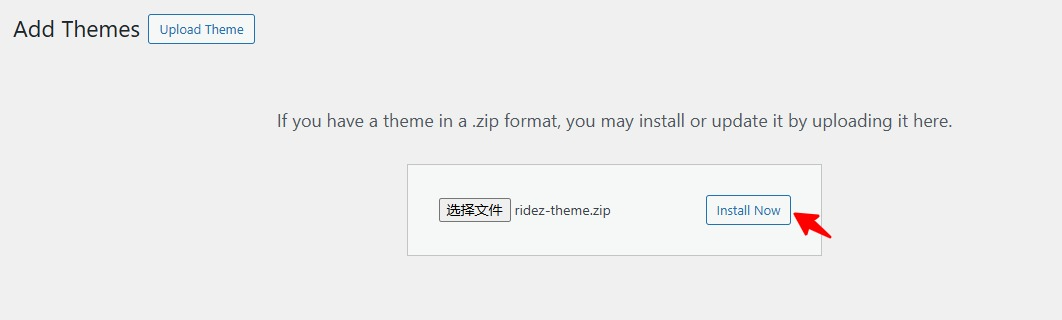
Choose the correct ridez.zip file.
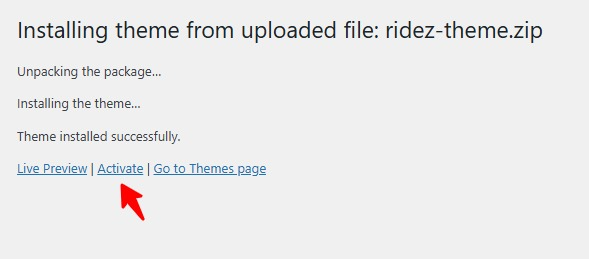
Click Install Now, and do not close the browser until installation is complete.
When you see “Theme installed successfully,” click Activate.
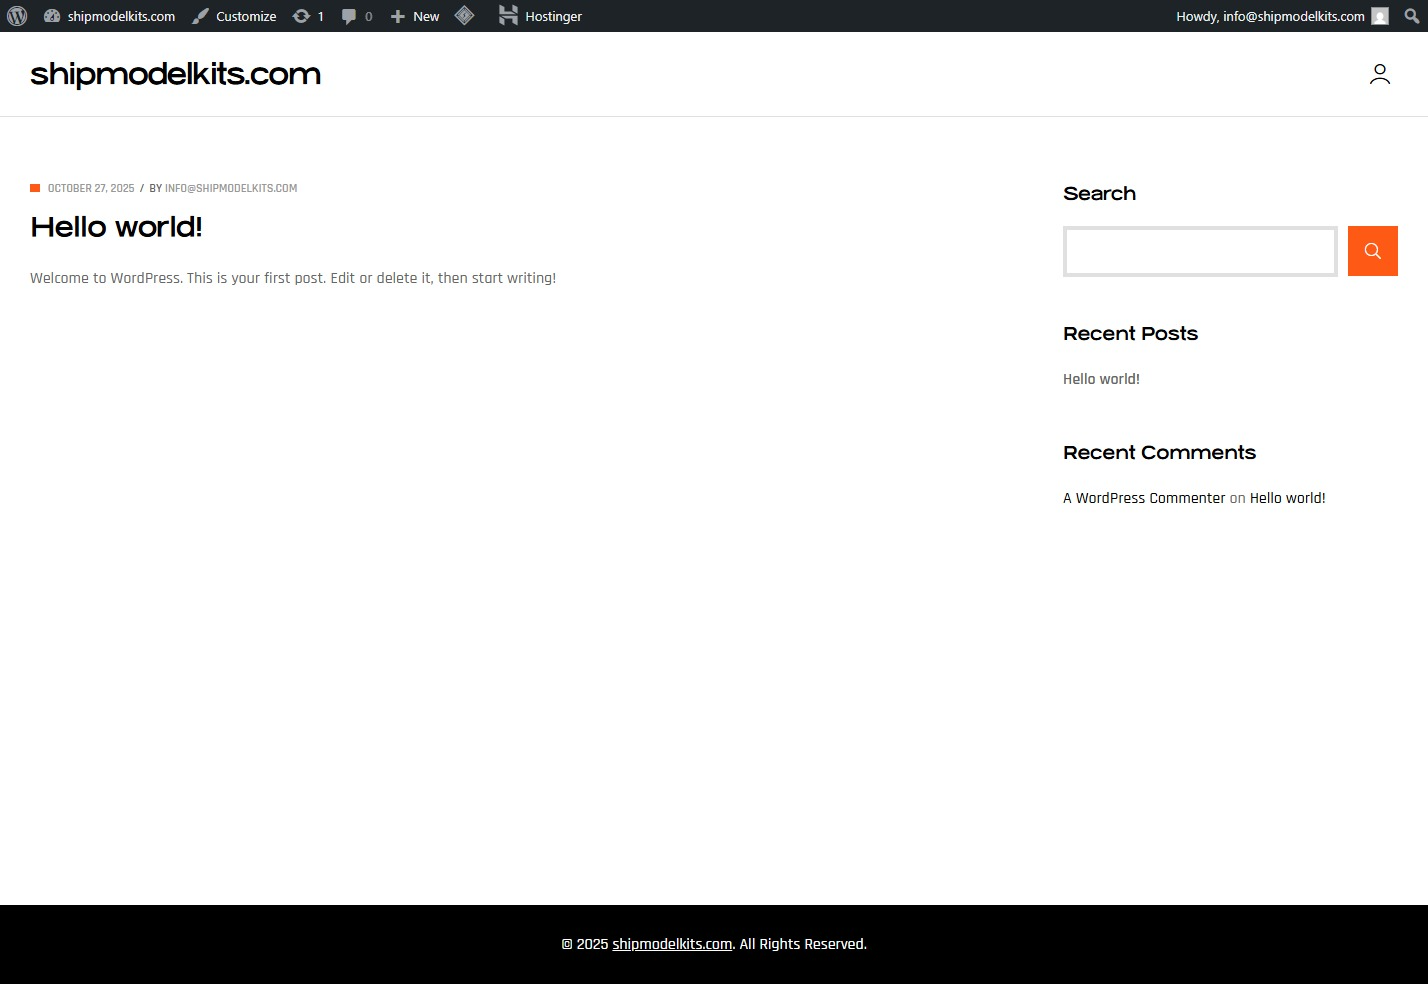
After installing and activating the new theme, refreshing the front-end homepage displays the updated style:
However, this is not yet the theme demo site, as the demo data has not been imported. The next step is to import the demo data.
💡 Installation may take a few minutes depending on your network speed — patience is key.
🌍 Step 3. Import Demo Data
After activation, you’ll likely want to import the demo content. Go to Appearance → Import Demo Data, or in some cases, Theme Options → Demo Importer.
However, not all themes store this feature in the same place:
Others use Unyson framework — look under Unyson → Demo Content Install.
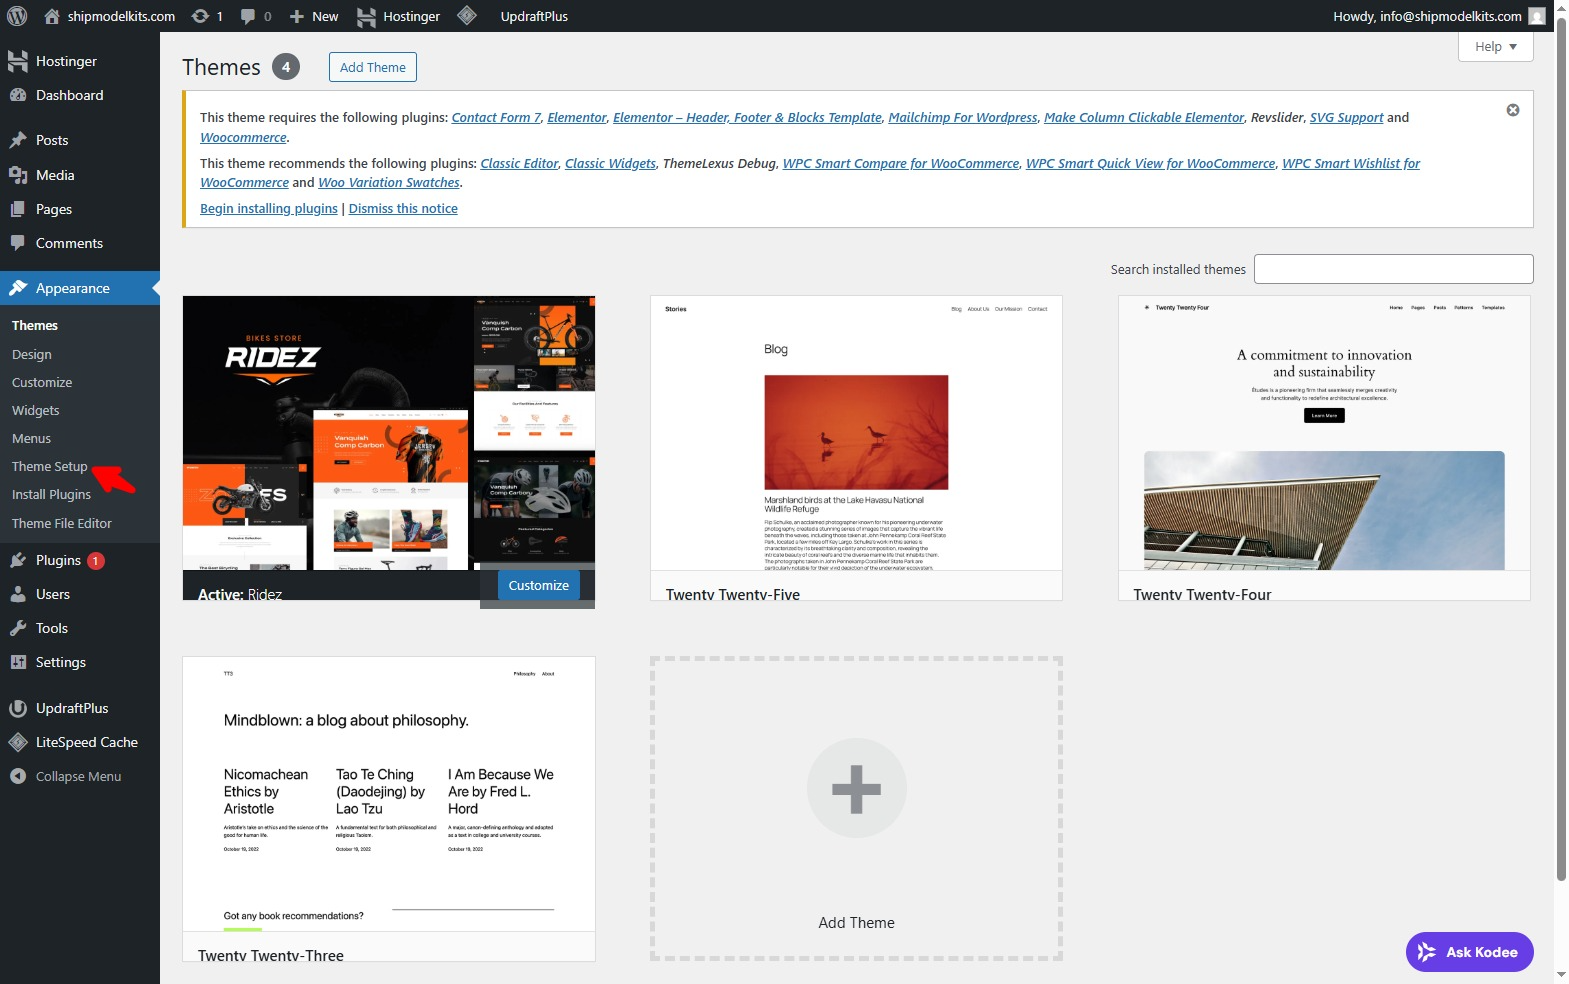
Some themes directly provide a Theme Setup option, such as the Ridez theme I’m using:
Directly under the Appearance menu – Theme Setup.
✅ The import process is usually straightforward:
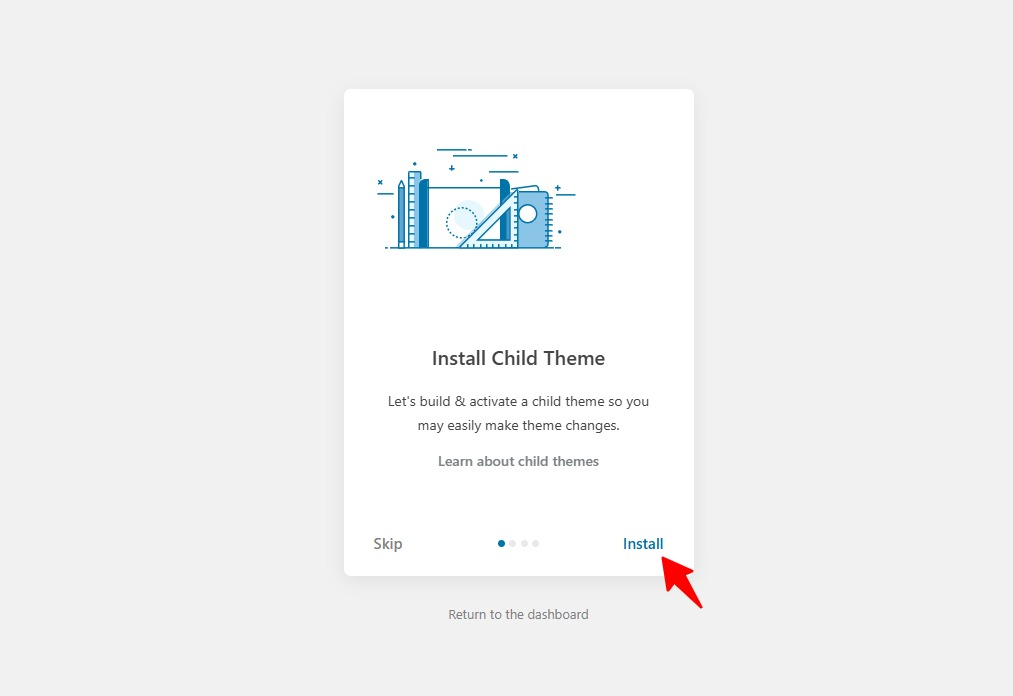
Click Theme Setup-Enter the Installation Demo Data Wizard interface and click Start.
Next, install the child theme (if available; skipping it won’t cause issues). The purpose of a child theme is to serve as the foundation for customizing theme files later on. This way, when the parent theme is updated, your custom modifications won’t be overwritten.
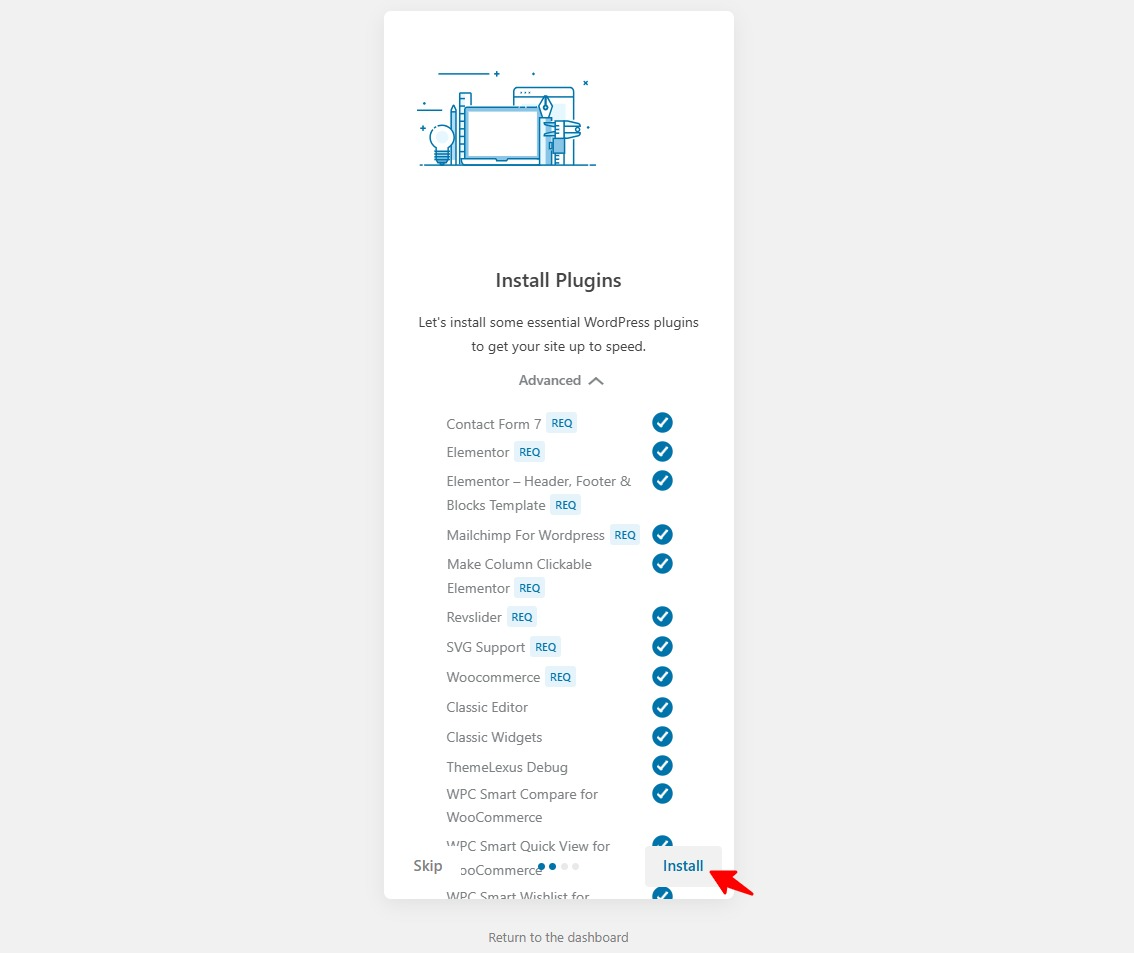
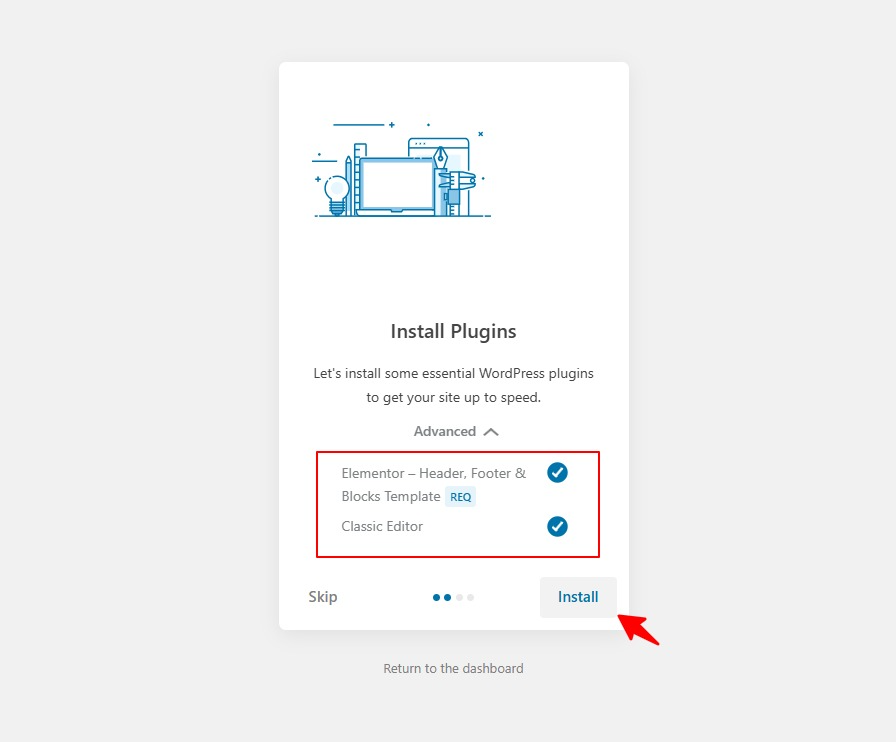
After installing the child theme, you will be automatically redirected to the next step to install the required plugins. Clicking the Advanced menu will display the list of plugins to be installed.Click to install:
After clicking Install, all plugins will begin installing automatically. Occasionally, network issues may prevent certain plugins from installing successfully. Don’t worry—you can simply click again to reinstall the remaining plugins:
Some themes may not provide this settings page, but once you activate a newly installed theme, a prompt will automatically appear at the top of the admin dashboard listing plugins that need to be installed and activated. Similar to such notification messages:
Simply install and activate each required plugin as instructed. Remember to install all plugins before importing demo data, otherwise the demo data may fail to import. You can later disable or delete any unnecessary plugins, but all required plugins must be installed before importing demo data.
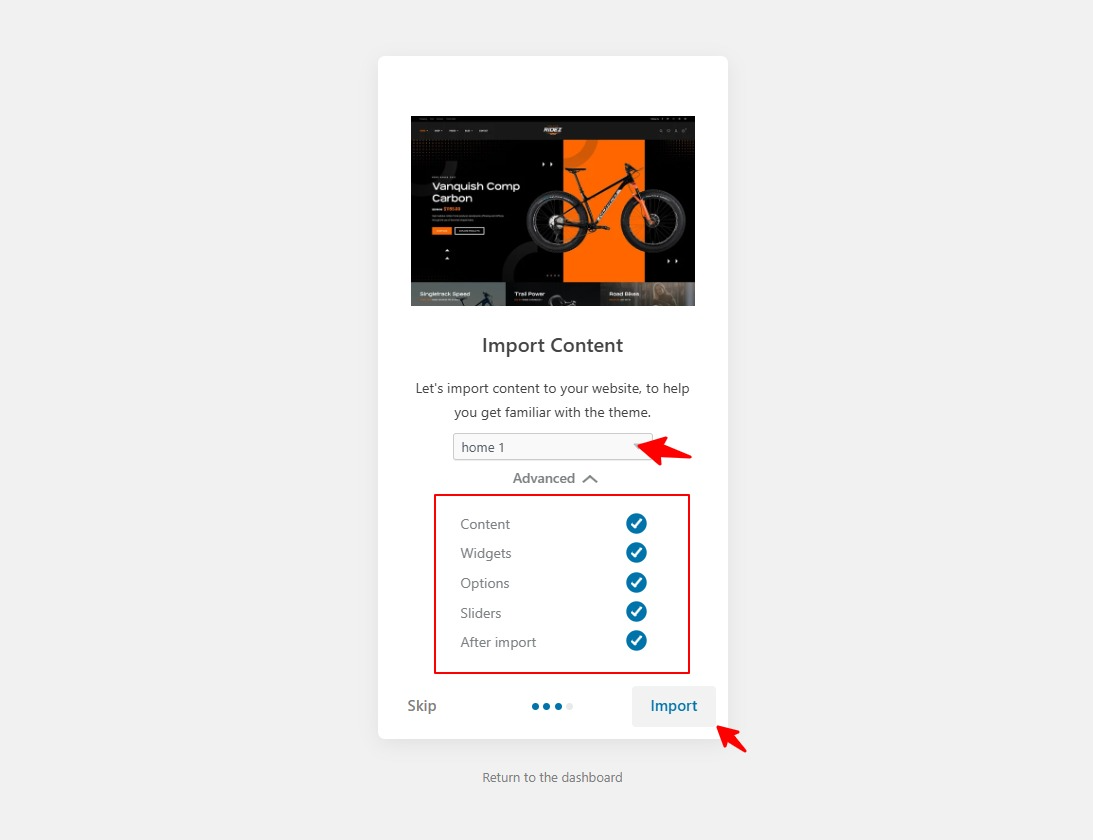
After all installations are complete, the system will automatically proceed to the next option. Select your preferred homepage layout (refer to the demo site for visual examples; this can be modified anytime later in the backend). Here, I choose Home1. Additionally, select the demo content you wish to import (choose Import All). Click Import.
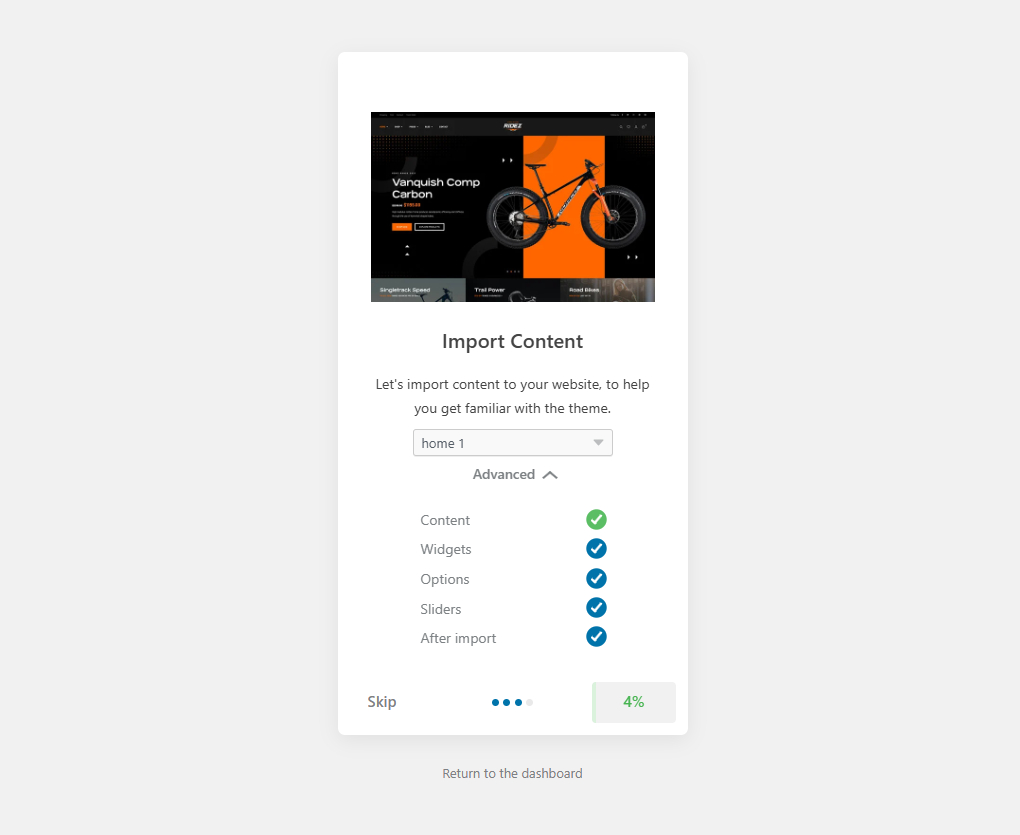
Then wait patiently for the import process to complete. Depending on the size of the demo data and your network conditions, this may take several minutes or over ten minutes. Do not close the browser window during the import process.
It only took me about three minutes to complete the import.
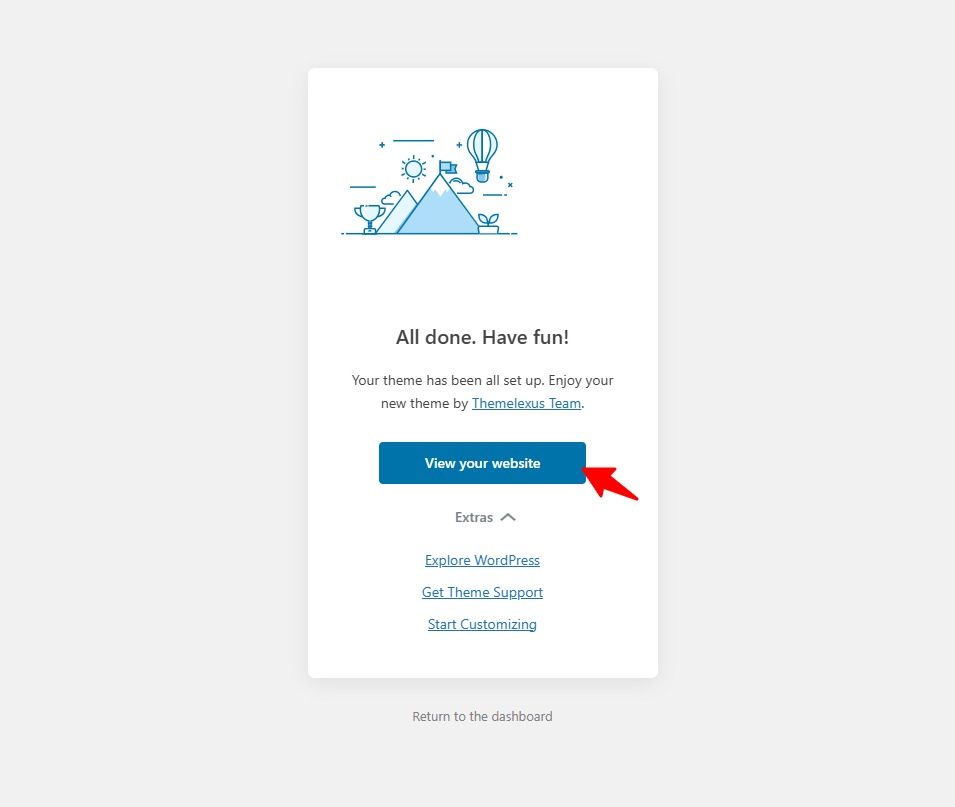
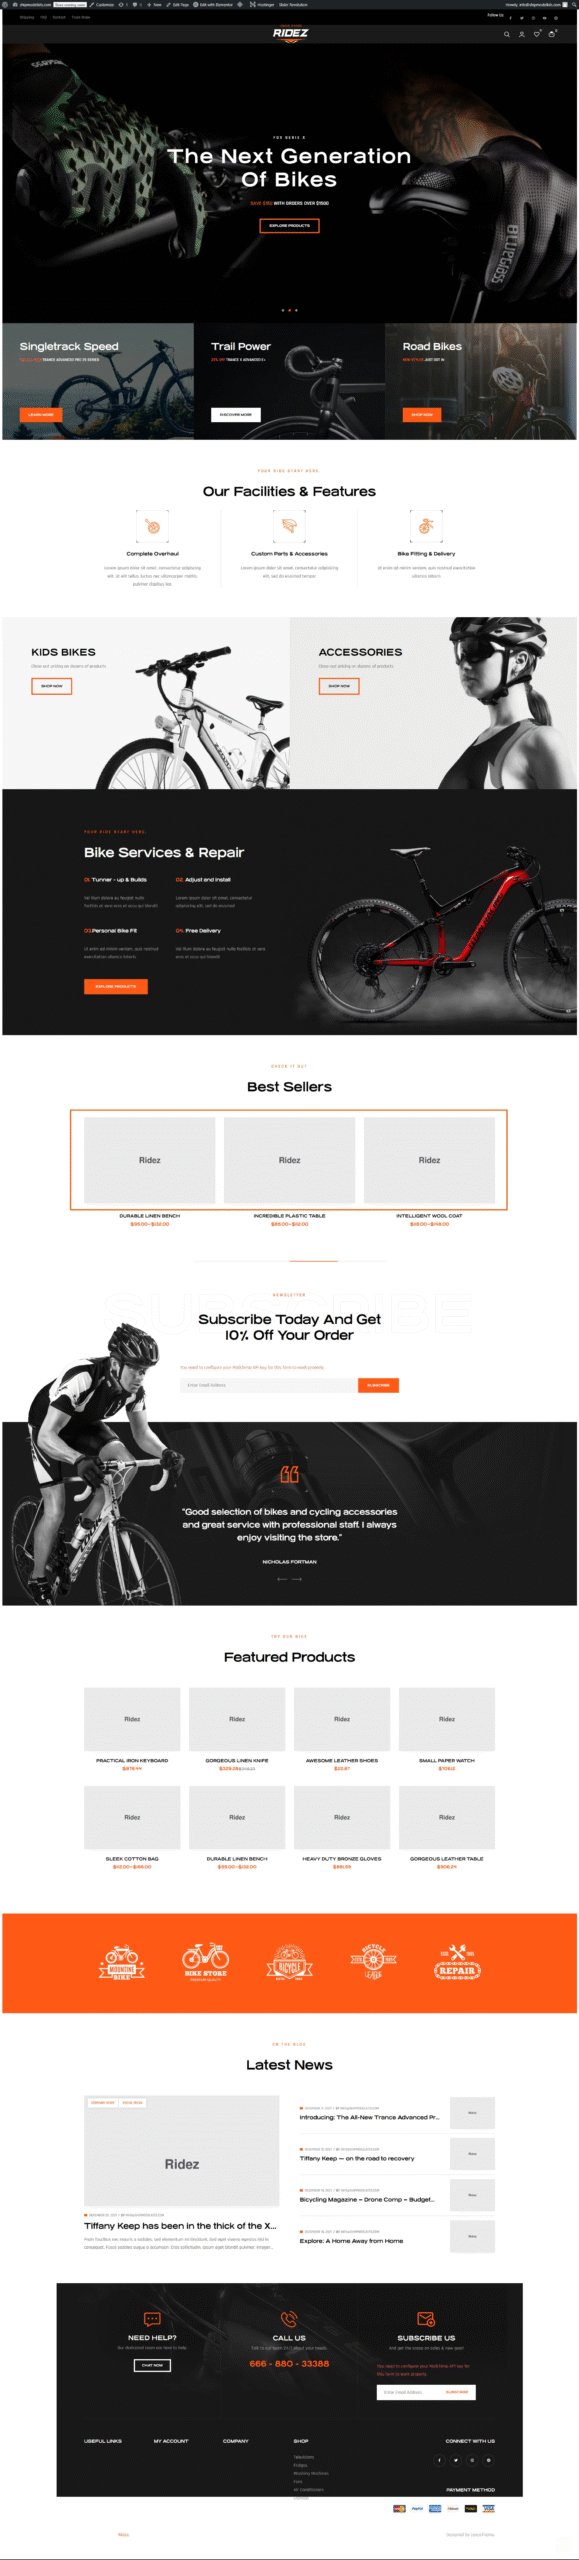
When I clicked to browse the site, it had magically transformed into an exact replica of the demo site:
Some images are missing because the theme may not hold the copyright for these images. You simply need to replace them with your own material images in the backend.
💡 Tip: Check the theme’s documentation or “Installation Guide” if you can’t find the importer — most authors include step-by-step instructions.
🌱 Step 4. Complete the theme demo installation and perform a data backup.
At this point in the course, we have completed the entire process of installing WordPress core, plugins, and themes. We now have a website that is identical to the target demo site. The next step is to modify the demo page content with our own copy and image assets, transforming it into our own website. Before proceeding, there is one crucial task remaining: performing a full-site data backup using UpdraftPlus. This ensures that if any errors occur during later operations, we can quickly restore the site to its current state. In fact, it’s wise to back up your site after every major milestone. Cultivate the habit of regular backups—better safe than sorry.
🎉 Congratulations!
Congratulations! Through dedicated learning, you’ve mastered the skills to build a WordPress website from scratch. But building is just the first step—much like how finishing a store’s interior is only the beginning. It won’t attract a steady stream of customers or generate sales. A thriving business requires substantial, ongoing management, maintenance, marketing, and optimization strategies. We welcome you to our next advanced course: WordPress Operations and Optimization. This program equips you with the skill set to elevate your brand-new website’s performance. It’s not just about technical operations—it’s about gaining invaluable mindset and principles. Let’s keep moving forward and learn for a brighter future!
Author Profile
Sean Lee
Freely.work Founder,15 years as a freelancer/digital nomad.Marketing consultant for Fortune Global 500 companies, digital marketing expert.


 December 17, 2025Mastering Google Search Console (GSC)
 December 16, 2025Yoast SEO Plugin: Overview, Benefits, and Installation Guide
 December 16, 2025What Is an SEO Plugin?
 December 2, 2025Adding Variable Products with Multiple Configurations